

jump to…
- The Fridge & Pantry
- Extending the Wall & Creating the Bar
- The Hutch & Open Shelving
- The Peninsula & Sink Cabinet
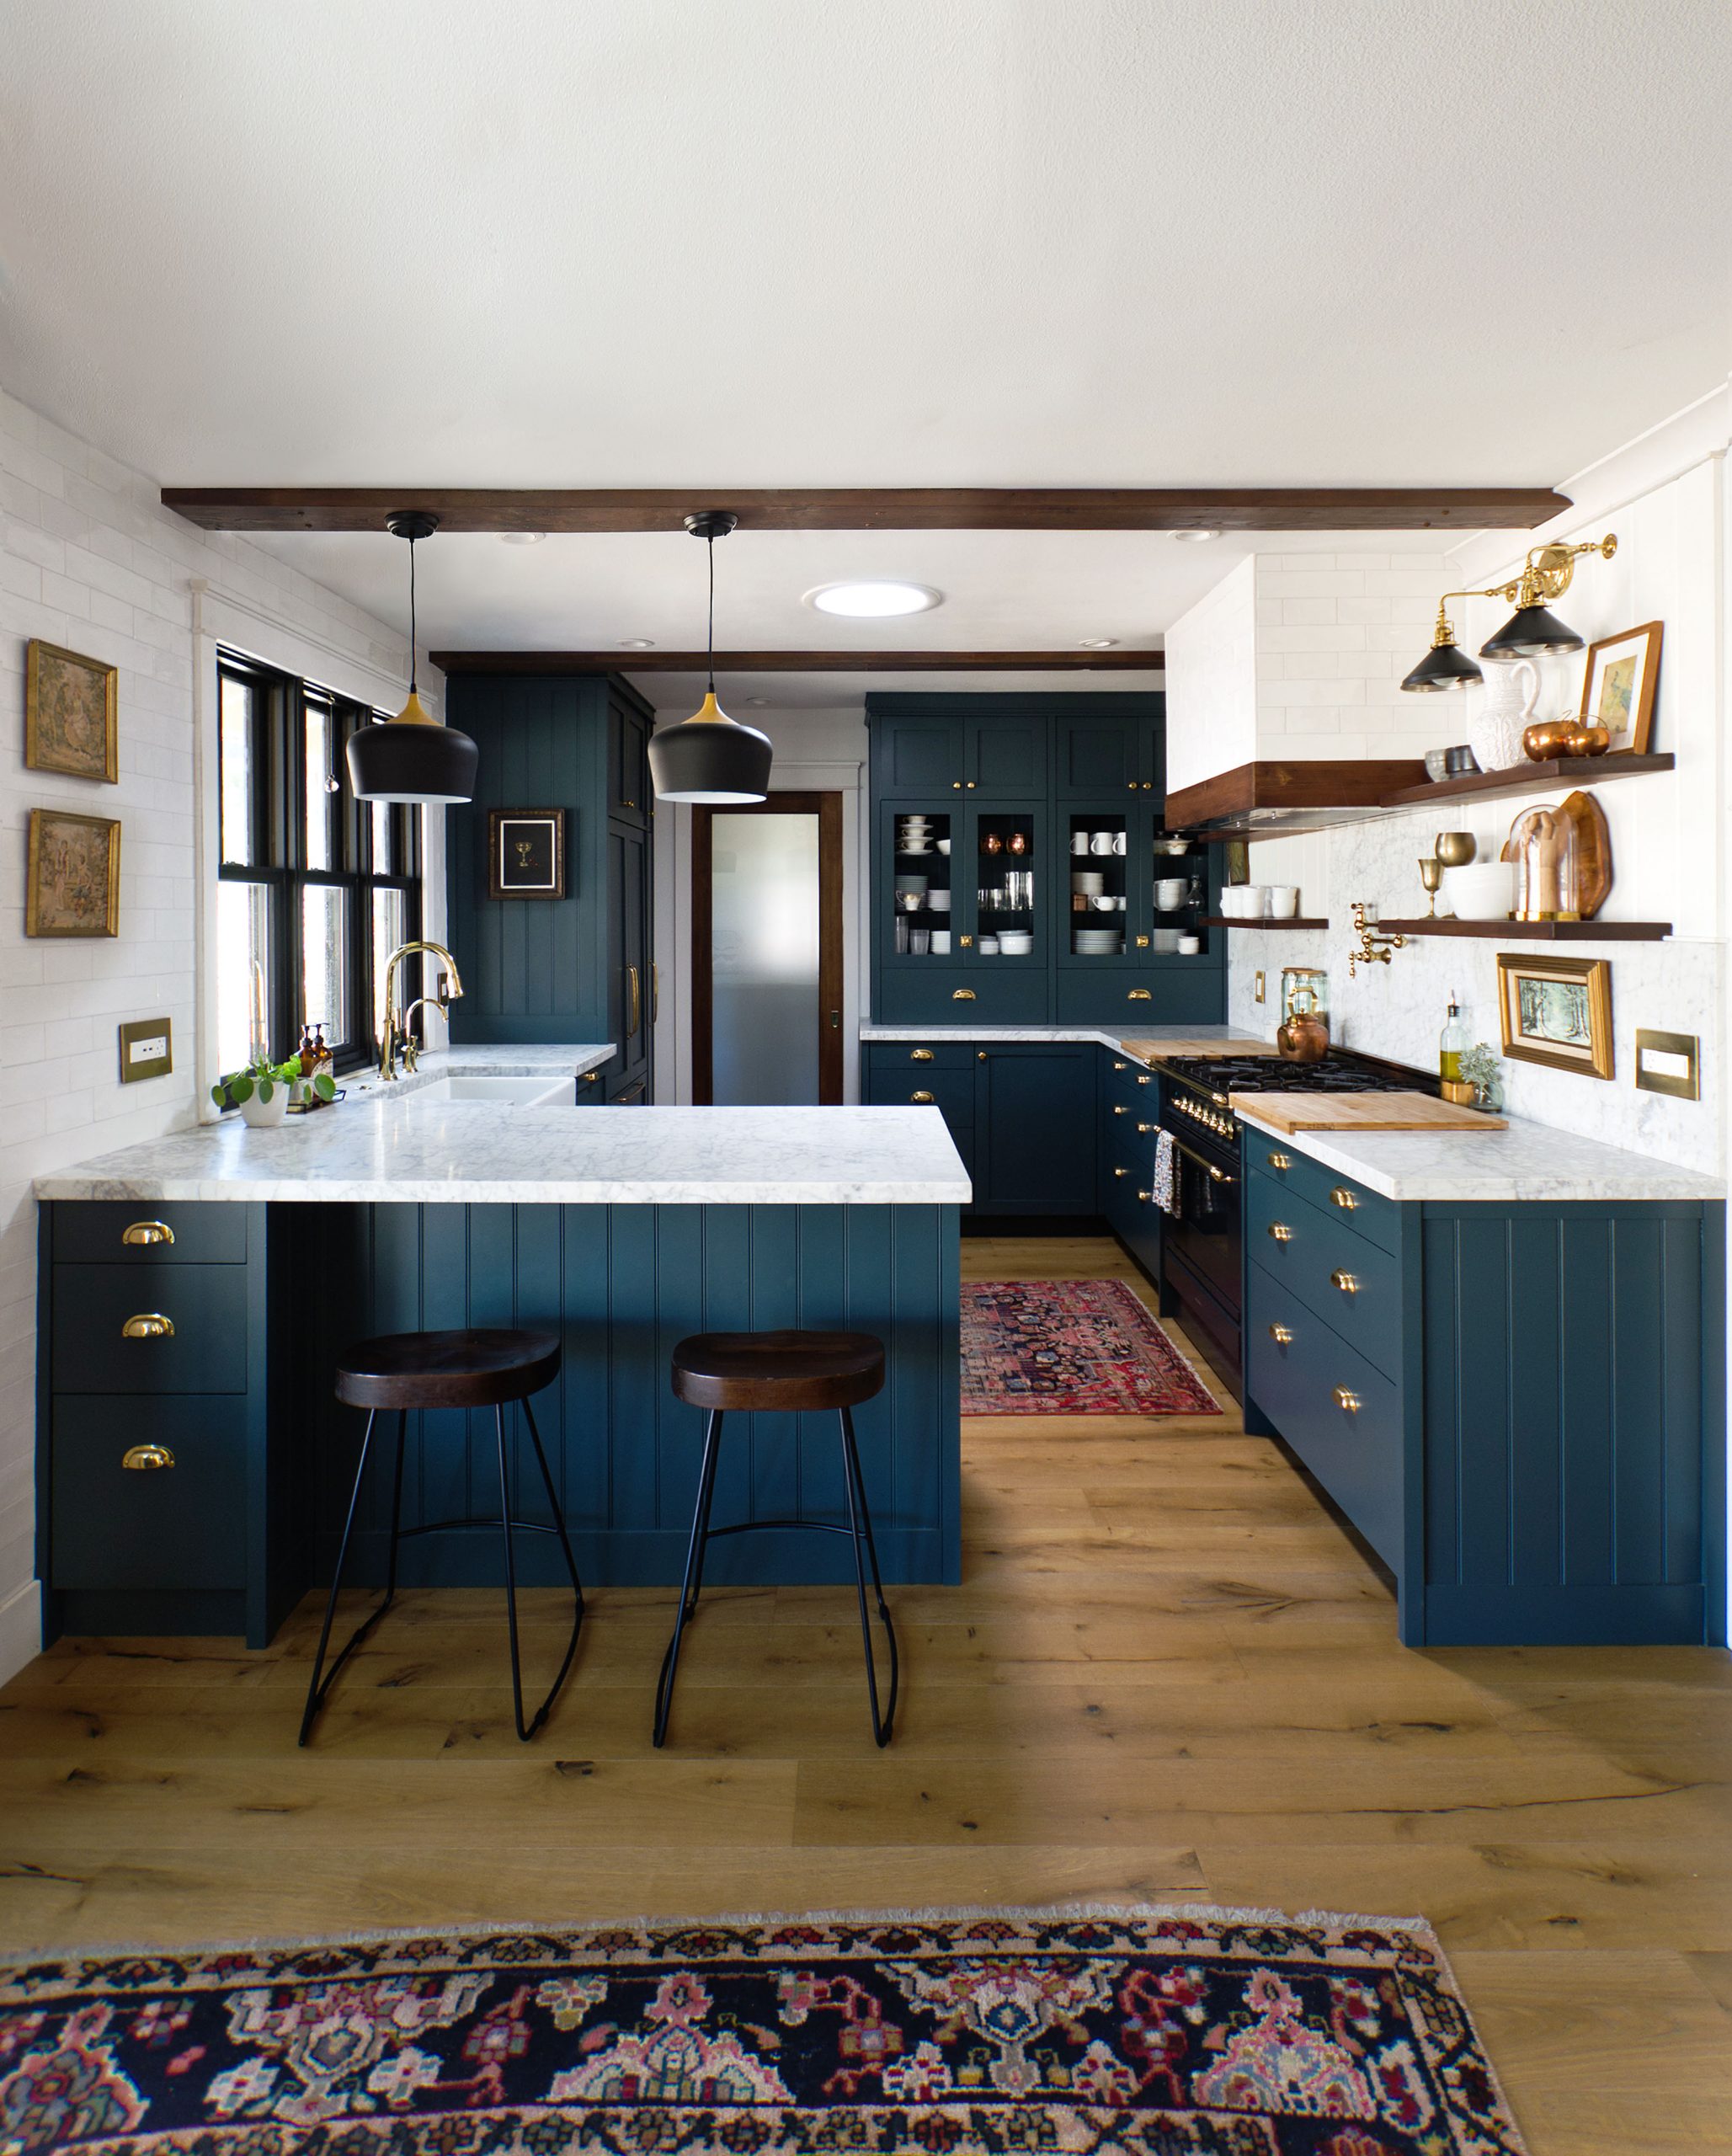
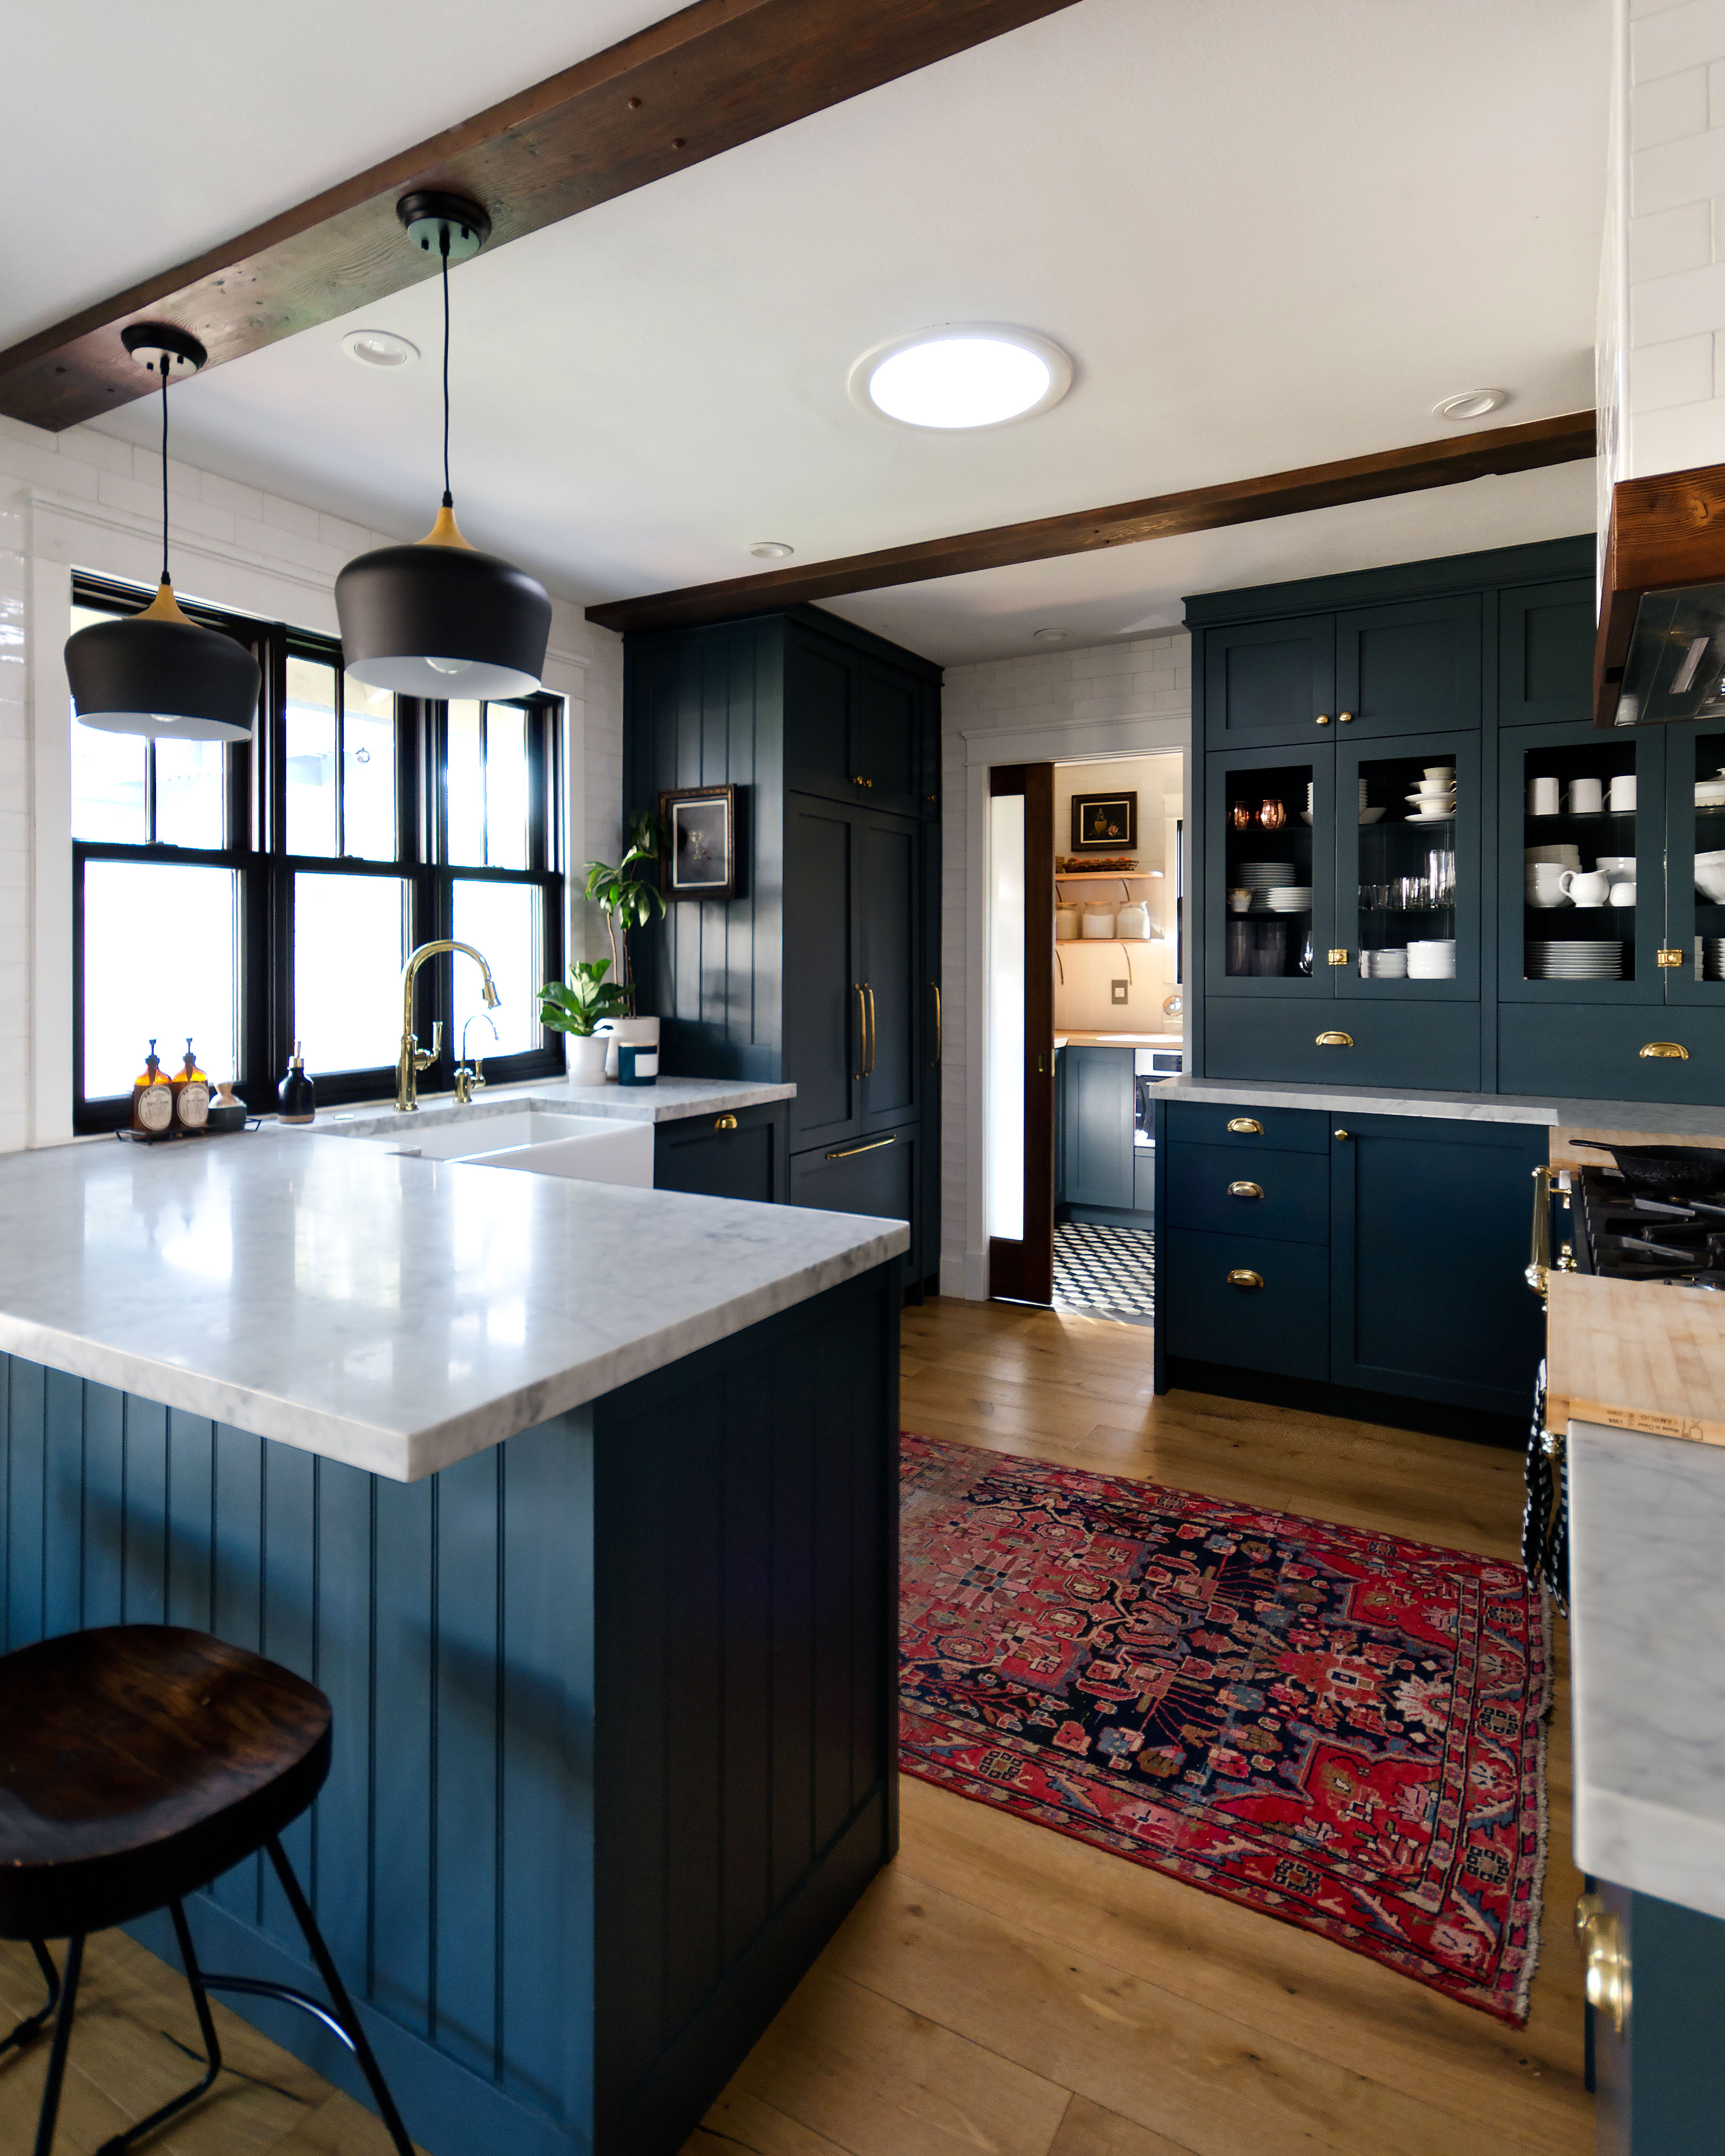
Some of the most common questions I receive (beside “paint color?!” It’s Narragansett Green, I’ll just get that out of the way) are in regard to our kitchen layout. “How big is your kitchen? “, or “What cabinets make up your countertop hutch? “. This article will answer the most frequently asked questions, and hopefully more!
However, in order to understand why our kitchen layout is the way it is, it is important to understand where we began, and the choices we made to adjust the existing layout to utilize the space in the way we felt was most beautiful and efficient!
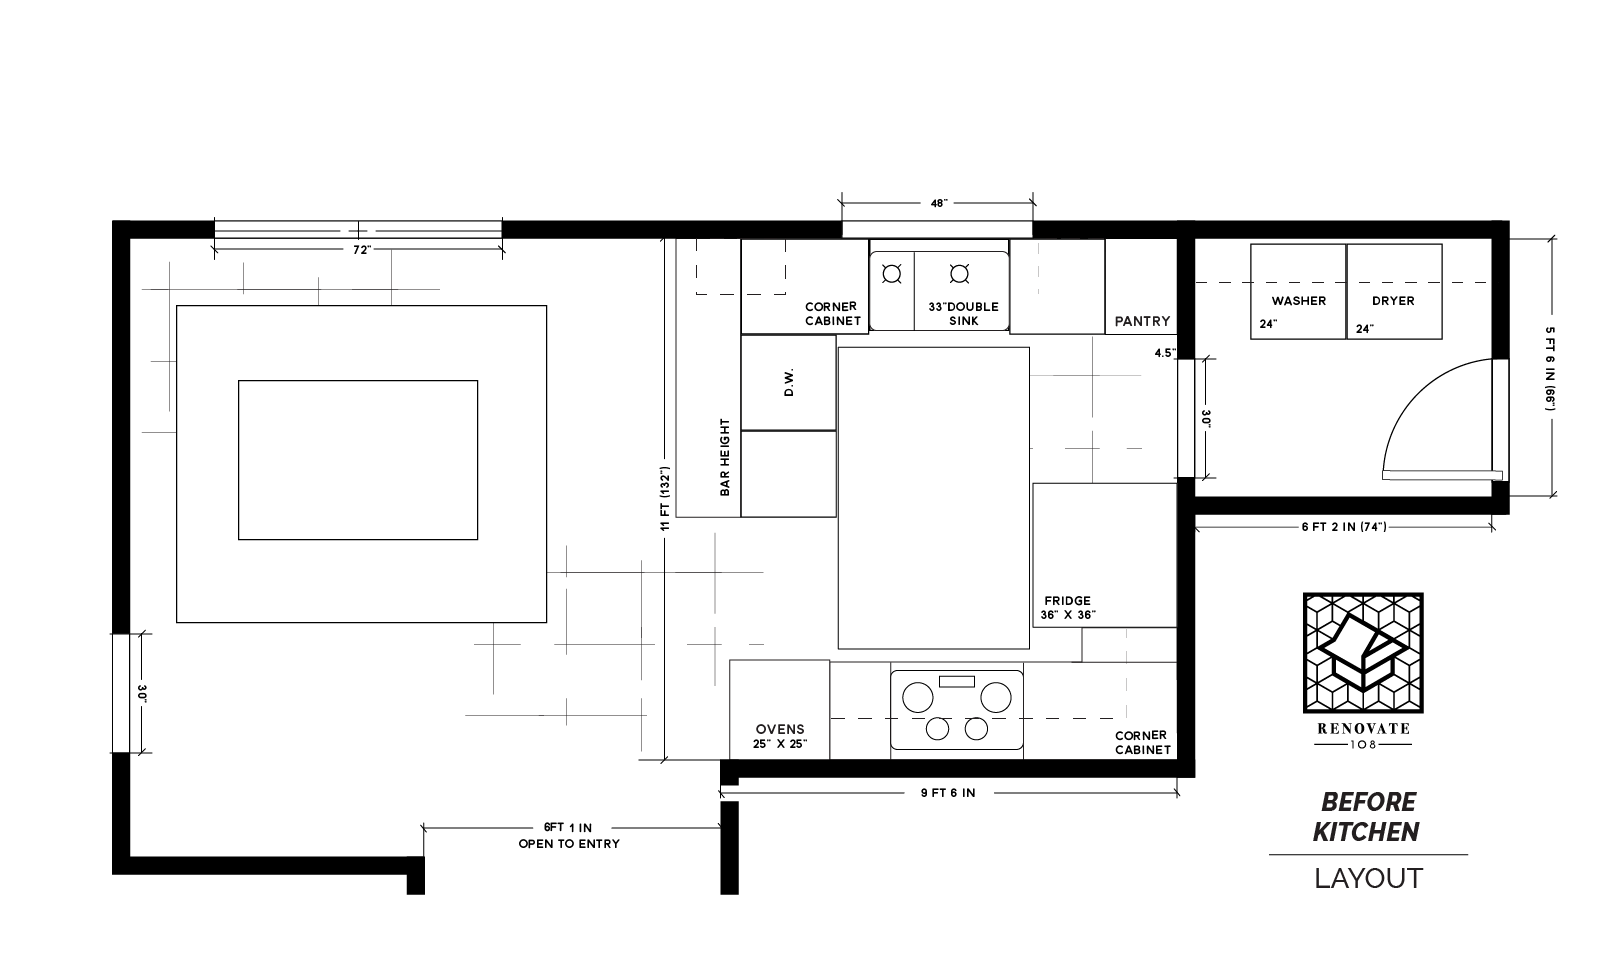
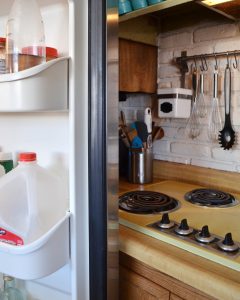
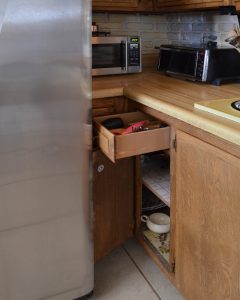
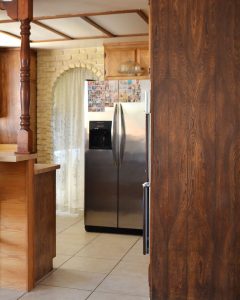
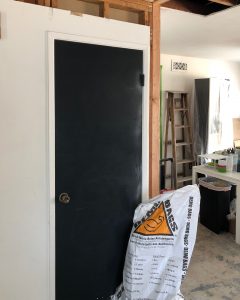
When we moved in, our kitchen had not been updated much since our house was built in 1964. It had the original appliances and cabinets, although I suspect that the counters MAY have been replaced at some point (I’m not 100% sure of that, because the sink was still the original mustard color that matched the stove top and range hood, and it is questionable that they would have kept the sink but replaced the counters? But perhaps they did). Someone had taken down the cabinets that floated over the peninsula and hung them in the garage at some point, and installed the brick veneer, faux arch (which was definitely cute, but also falling apart) and a dishwasher. Other than that, I think the contact paper in the cabinets may have even dated back to the 60s. In regards to the layout, mostly we liked it (In general, we really like the layout of this house). The double-L shape felt friendly and comfortable, and there wasn’t much we could do to change the basic shape without totally reconfiguring our house (which we didn’t want or need to do).
However, the fridge placement was very problematic, the corner cabinets were almost useless, and the pantry was too narrow and deep. The fridge doors opened into the stove top, and blocked drawers from opening fully. We also didn’t enjoy walking into our kitchen and BAM! Giant hunk of stainless steel in yo face. We also felt like there was a lot of underutilized space in the laundry room and the dining area.
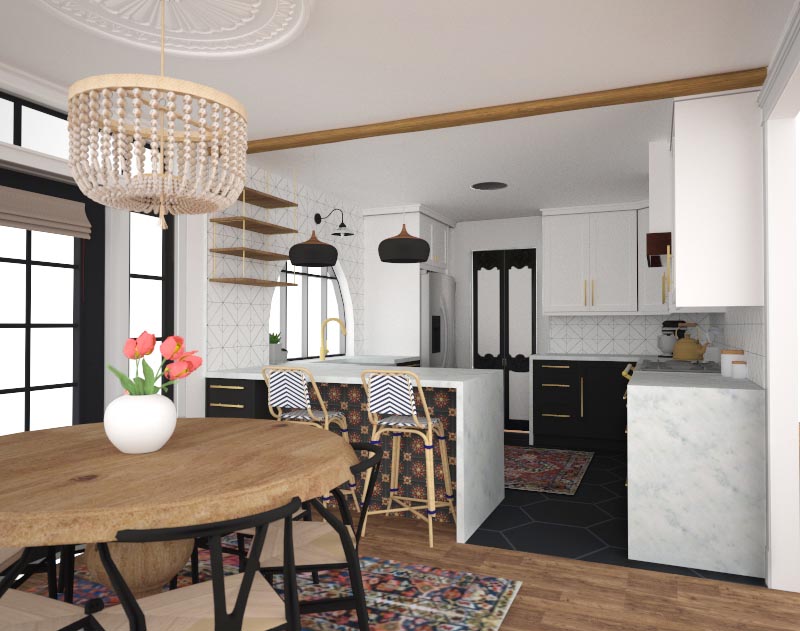
So, final layout of our new kitchen came together quickly; we’d stick with the double-L layout, with the sink and the stove close to their original positions, but we’d solve the problem of the fridge location, while providing significantly more counter space and usable cabinet space by extending the range wall, and adding cabinets to the dining space and laundry room, all without increasing the square-footage of the kitchen.
The Fridge & Pantry
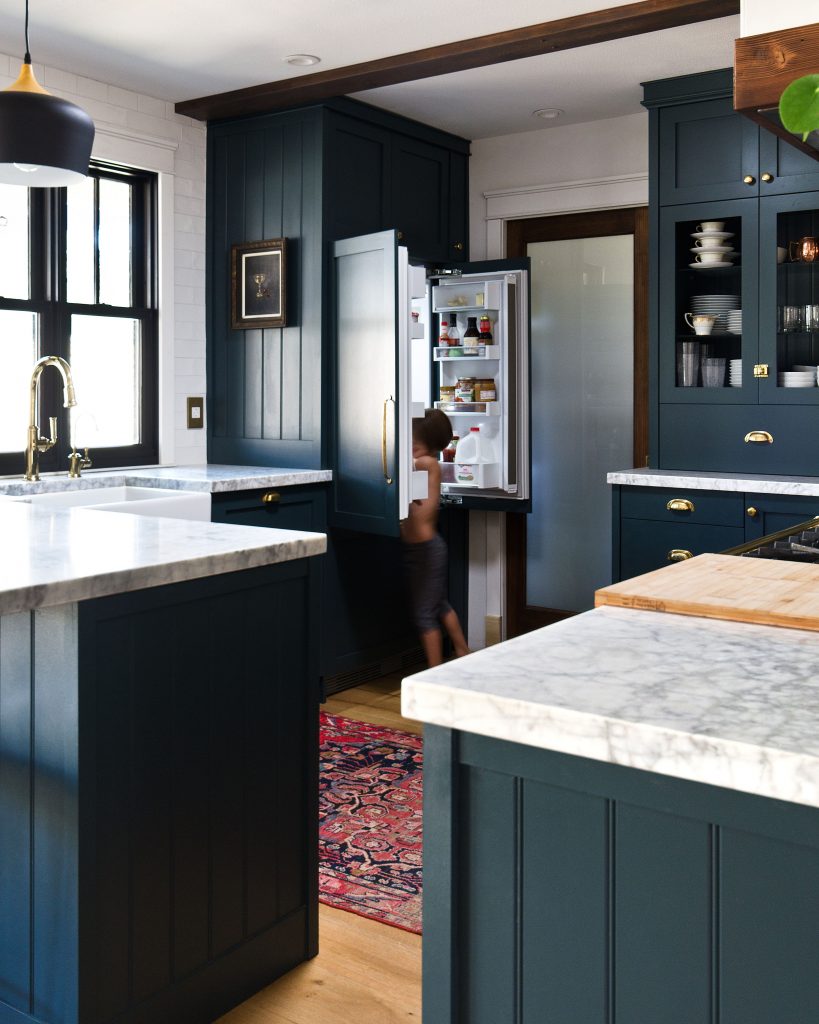
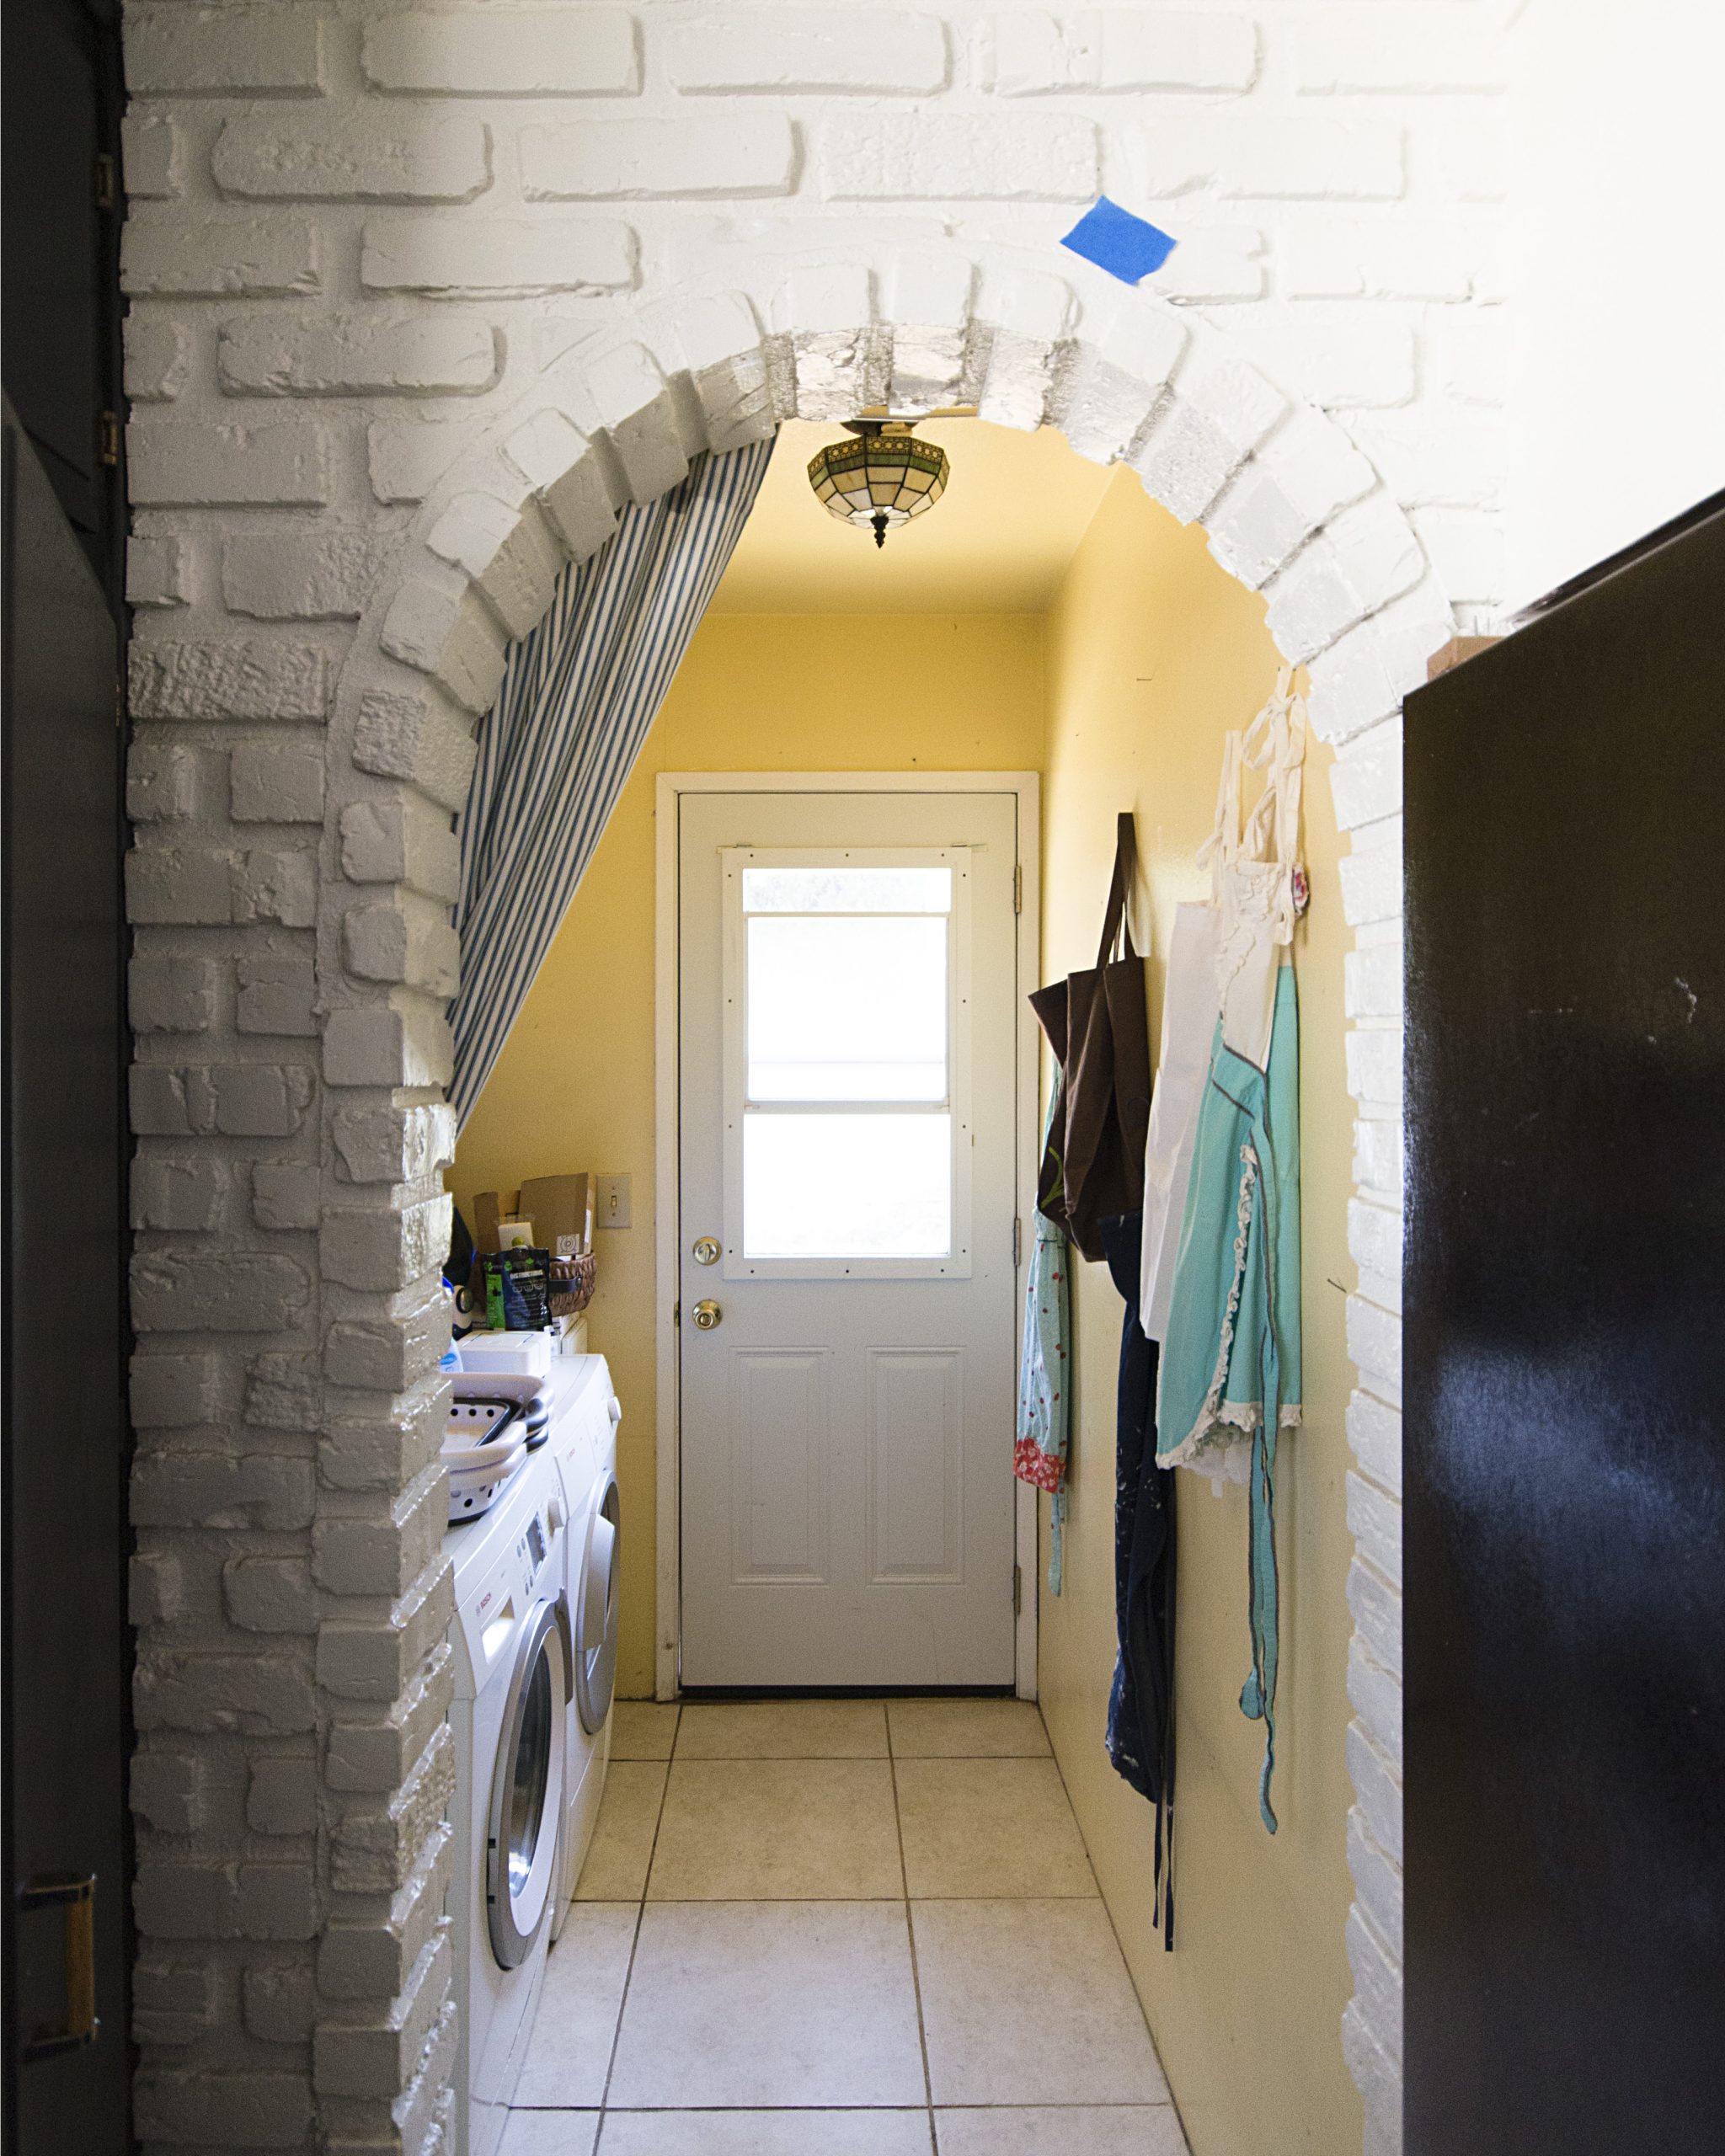
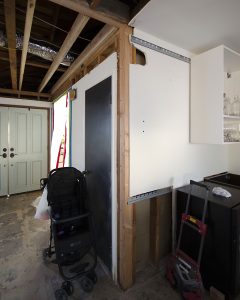
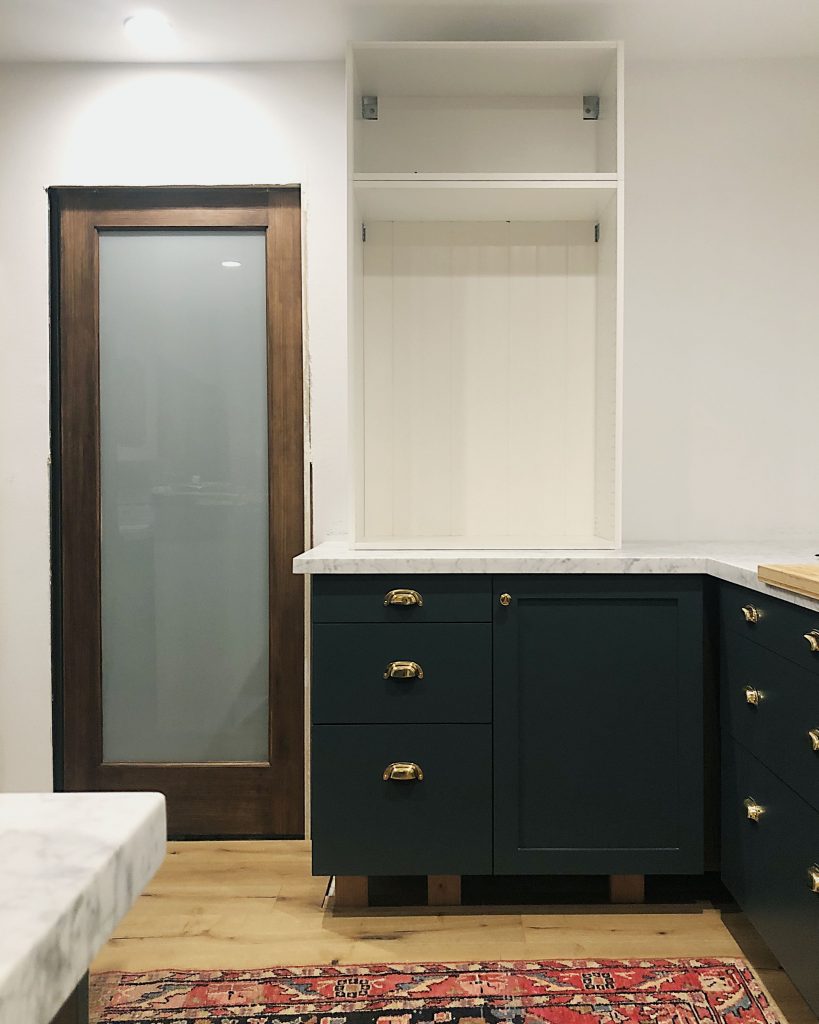
Before we moved in, I recognized that an attached laundry room can easily be converted to a great walk-in pantry. Since our food storage would have plenty of space in the old laundry room, we could move the fridge to the space the pantry previously occupied.
Despite being an already small space, the laundry room was previously very under-utilized, with only a row of shallow upper cabinets. We never used the door to the side yard, and since we were putting in the french doors in the master bedroom/studio-office (on the same side of the house) we felt very comfortable replacing the door with a small window to allow us to install more cabinetry. In addition to removing the door, stacking the washer and dryer allowed us to install a 12″ pull out cabinet, a 38″ corner cabinet with a corner carousel, and a 24″ undercounter microwave cabinet and drawer, in addition to a 24″ cabinet above the stacked washer and dryer and 3 rows of open shelves, AND a butcher block counter! Moreover, when we do our addition, we will be creating a full laundry room in the new bedroom hallway space, near the garage, and this pantry will no longer have to pull double-duty! We will be able to easily install a 24″ x 90″ IKEA cabinet in the space, and have even MORE pantry storage!
“An attached laundry room can easily be converted to a great walk-in pantry.”

Extending the Wall & Creating the Bar


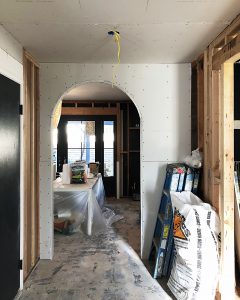
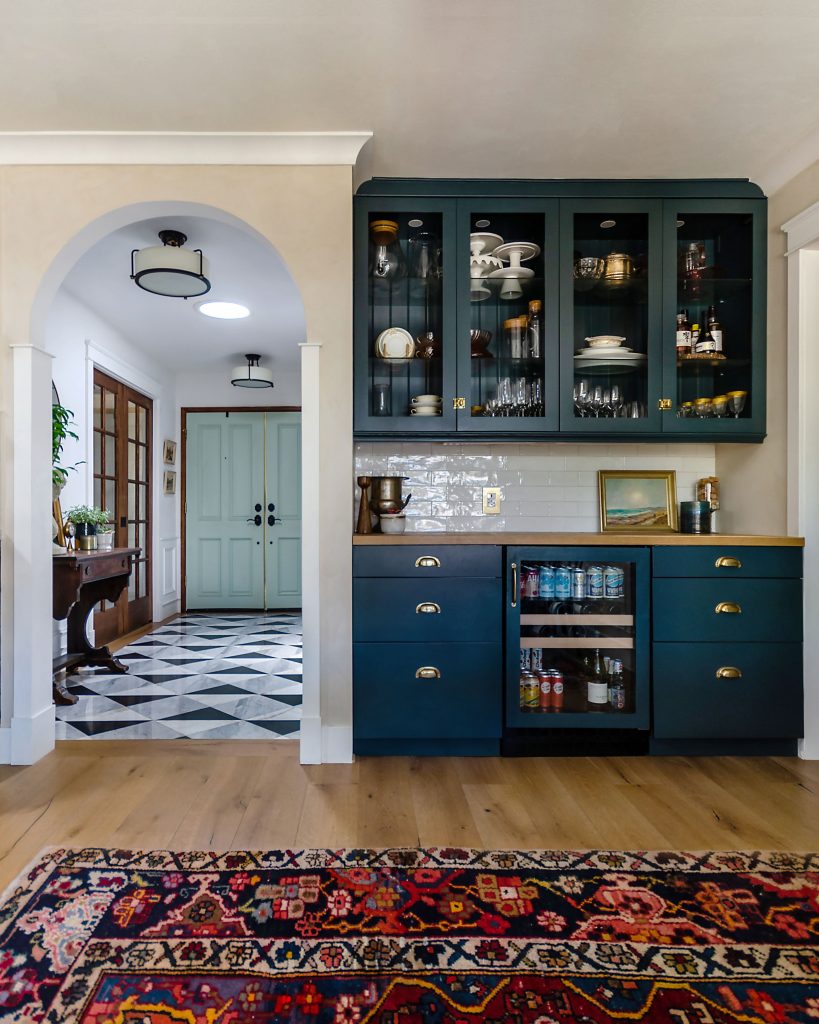
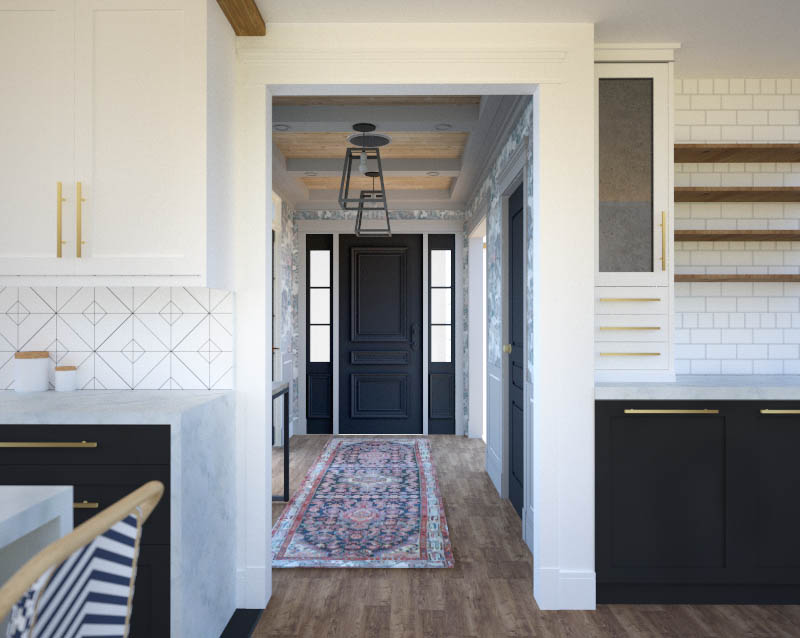
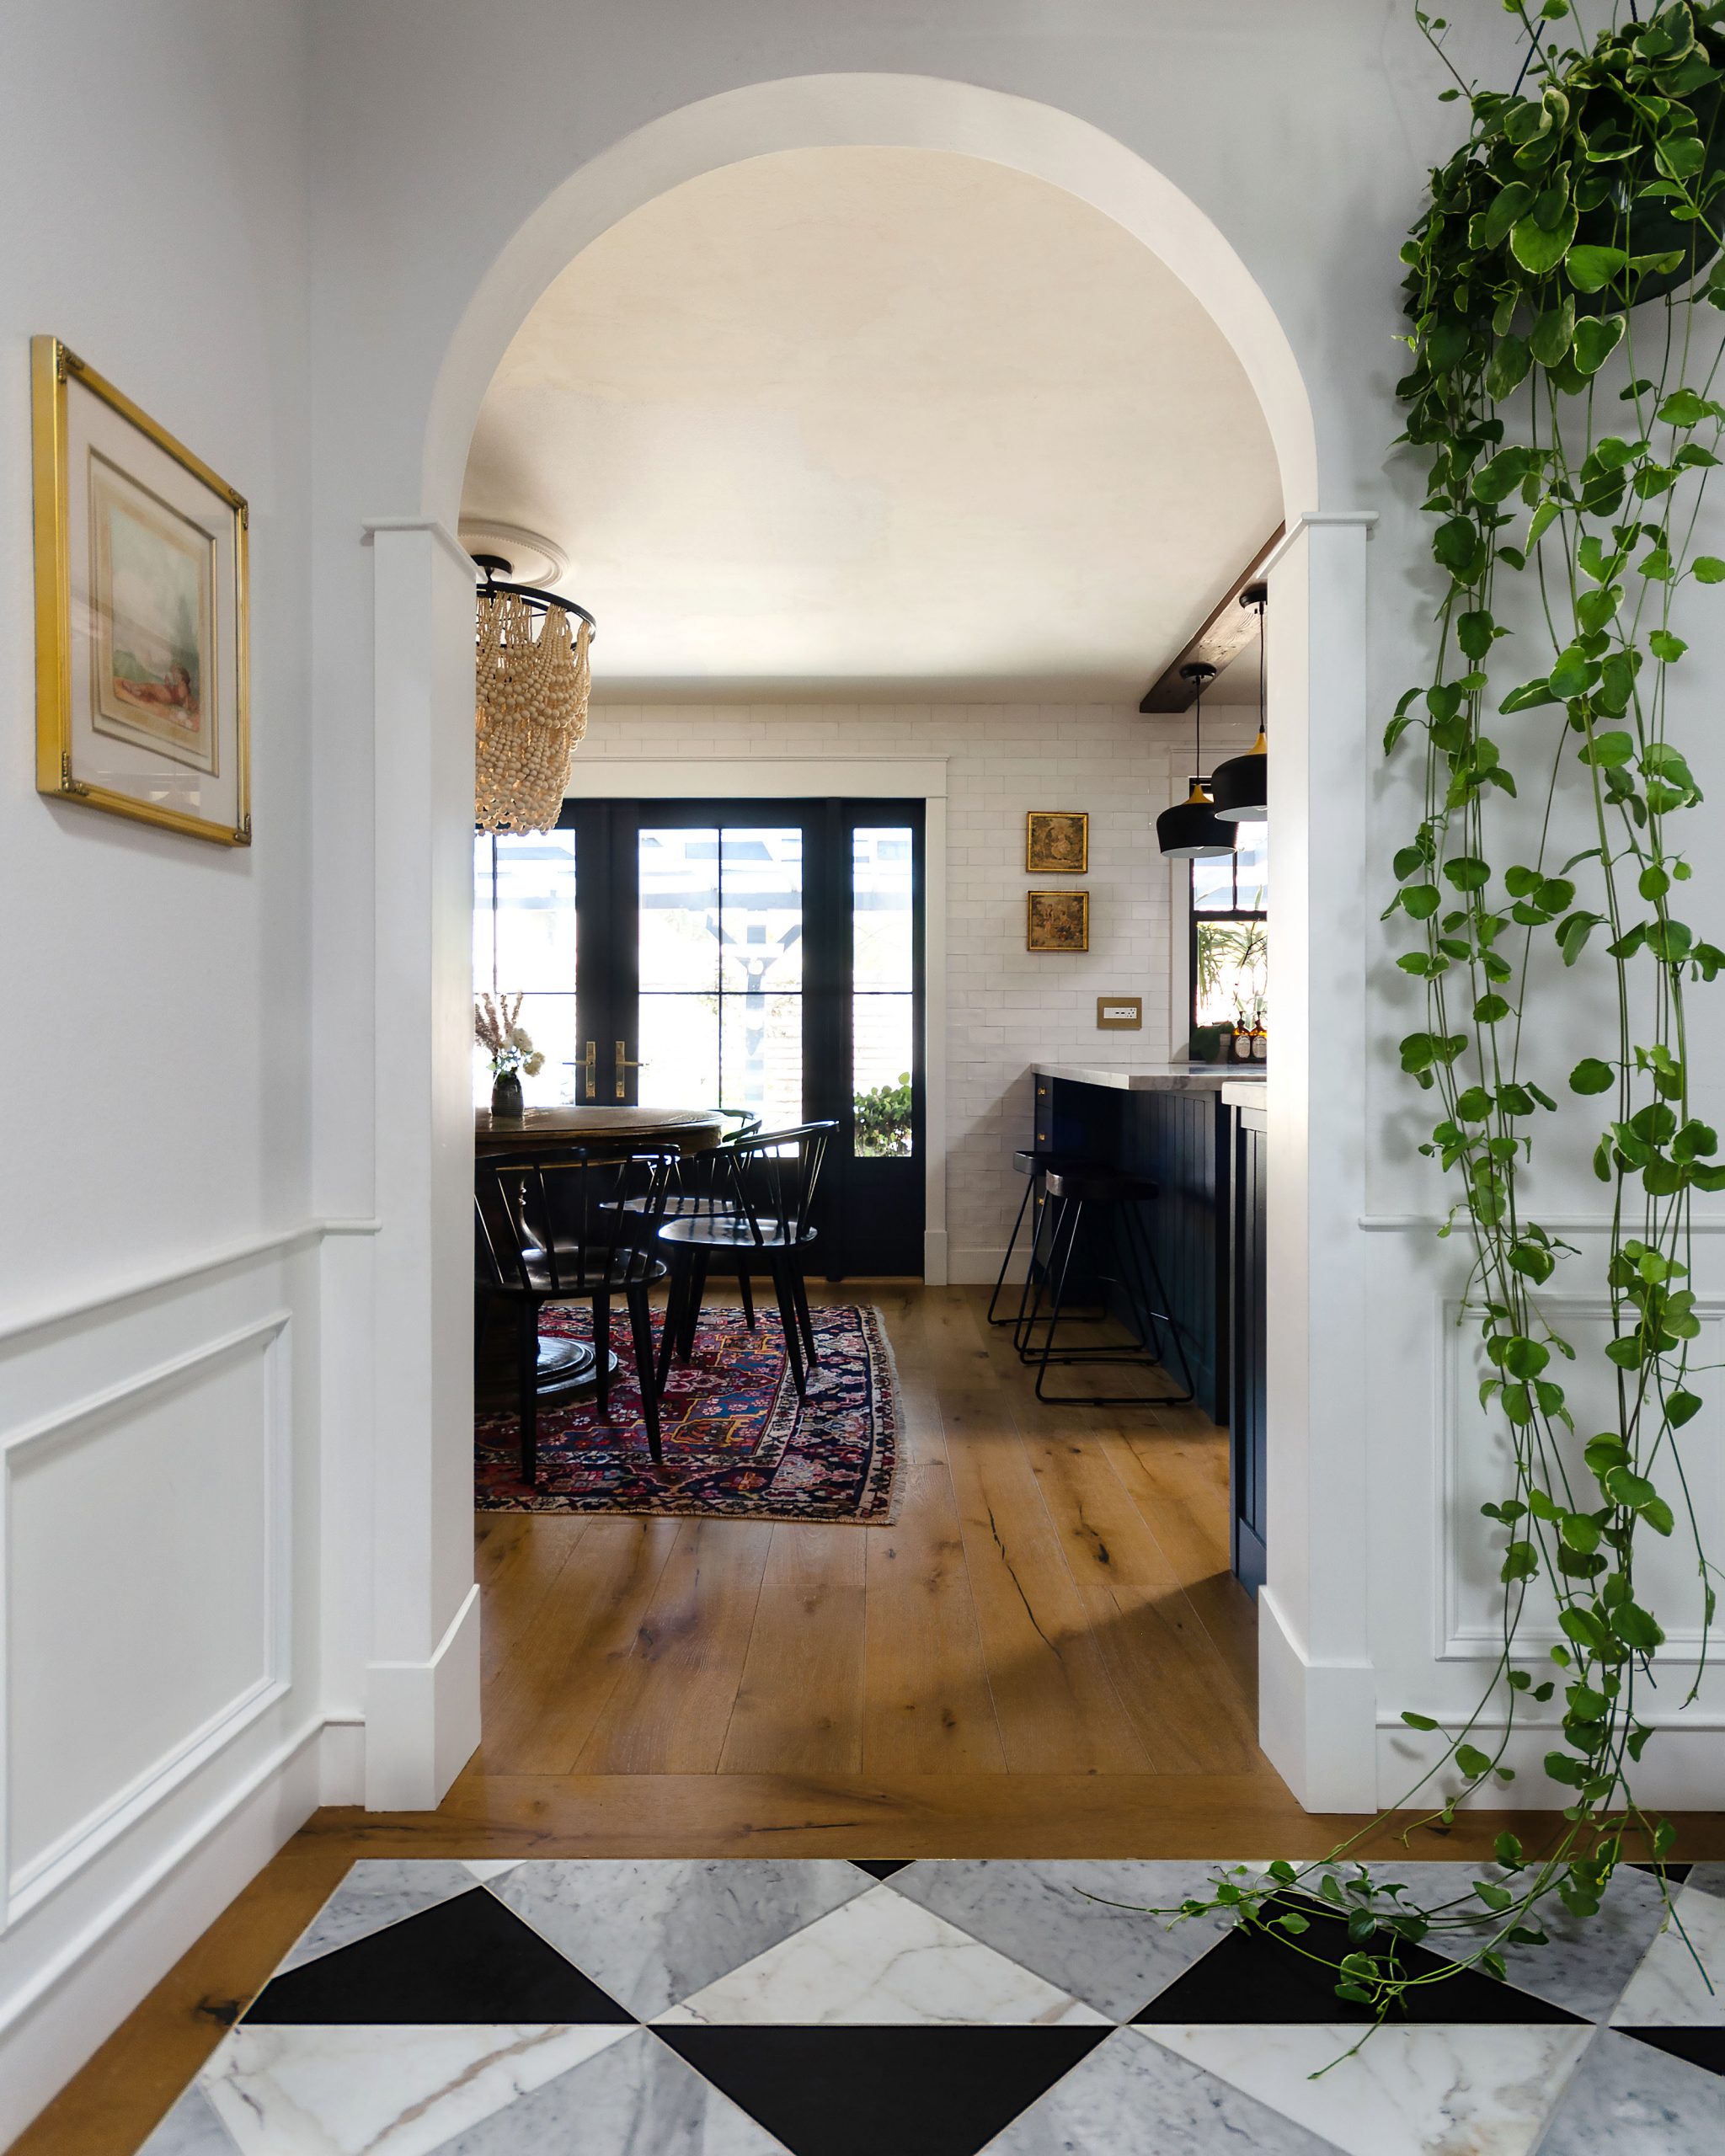
The next easy (for me) decision was to bring the cabinets on the wall with the range out about 24″, and creating a cased opening into the entry space, so we could have more cabinets on that wall. This took some convincing on my part, and required a lot of drawing blocks on the floor to prove that by reducing our 6ft open entry to a 4ft cased entry we would still have PLENTY of space to enter the kitchen. Also, extending that wall required us to make a return wall that cleverly allowed us to create an entirely new bank of cabinets, the dry bar. (We’d also be enclosing the entry allowing it to be its own space, and I really loved that idea). See below for the slider of the before and after layouts in case you need a visual to more fully understand; the slider illustrates it better than words ever could!
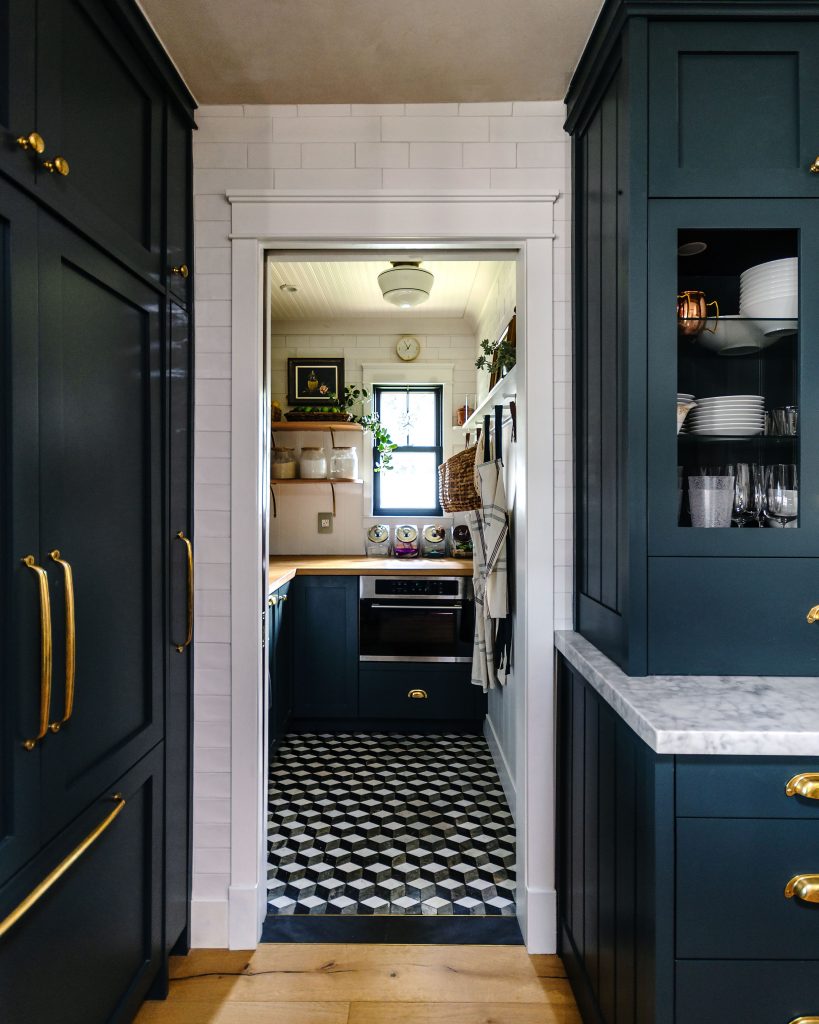
“By using the same cabinets, tile, and hardware from the bar space to the pantry, the kitchen feels so much larger without adding a single square inch!”


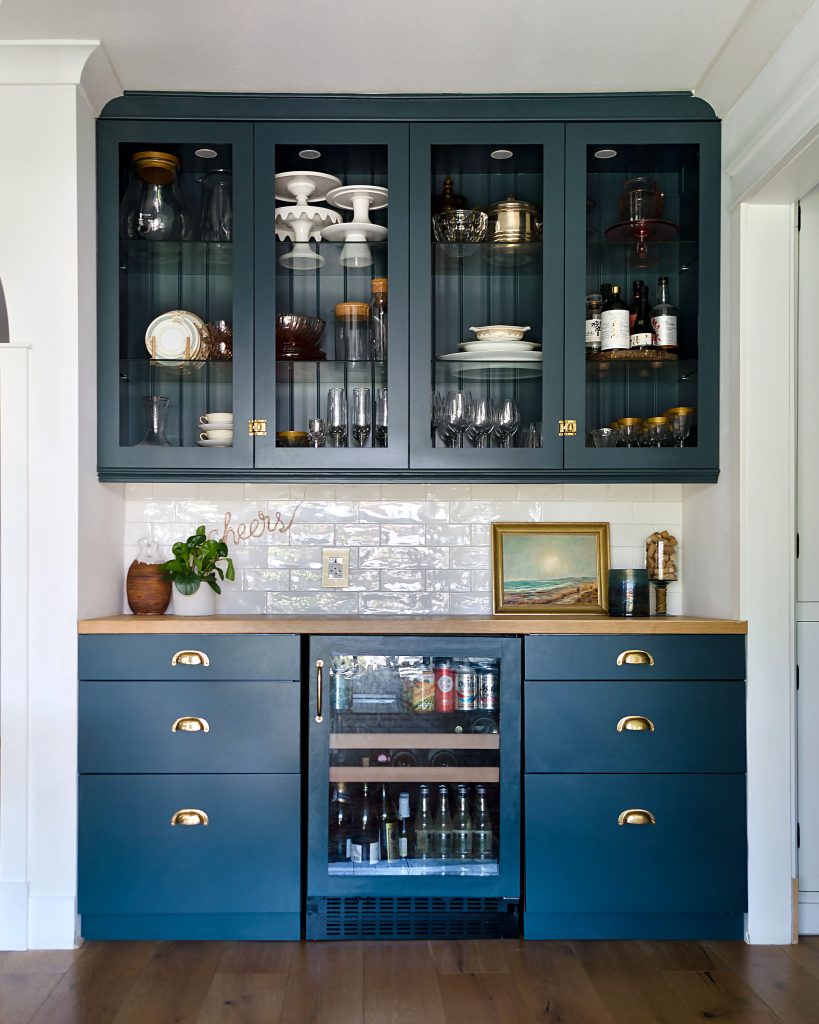
Sometimes, you make changes to a home that feel like they were an original feature to a home, and adding these cabinets is certainly one of those instances! And by using the same cabinets, tile, and hardware from the bar space to the pantry, the kitchen feels so much larger without adding a single square inch!. This is because your eye connects all of these elements and categorizes it as the same space, so the further you spread out common elements, the larger a space can feel.
One element to note here is that the new wall in between the bar and the entry is only 2″ thick. I can hear you all asking “WAAAAT, how can that be??!” along with Tyler, my dad, and the carpenters who were tasked with building this wall. Even after I explained that the wall would have a return and you would never visually be able to tell, skepticism was still abundant. The thin wall happened because I got greedy for storage space.
Or, you could think of it in a kinder way, in that I was being resourceful and not wasting space. We had 74″ on this open wall. Your average wall is 4.5″ thick (drywall is usually 1/2″ thick and a 2×4 is 3 1/2″ (I know, confusing), for a total of about 4.5″). I really wanted to maximise the space, and I also wanted symmetry. So that meant on the uppers, I could go with two 36″ cabinets for a total of 72″, or the next one down at two 30″ cabinets for a total of 60″, a difference of an entire foot! (Although perfectly acceptable, obviously a 30″ and a 36″ would work in the space, but in cases like this my preference for symmetry and balance would win out) It felt like such a waste. I decided that since this wall was not structural in any way, it would probably be fine being thinner than the average 4.5″ total wall thickness. We constructed this part of the wall with 1/4″ drywall and 1″x2″s, and it worked out great!
Until it didn’t. The upper cabinets actually measured 72 3/8″ when pushed together and we had to cut into the drywall at the sides to hang them. After that, it worked out great!
The Hutch & Open Shelving
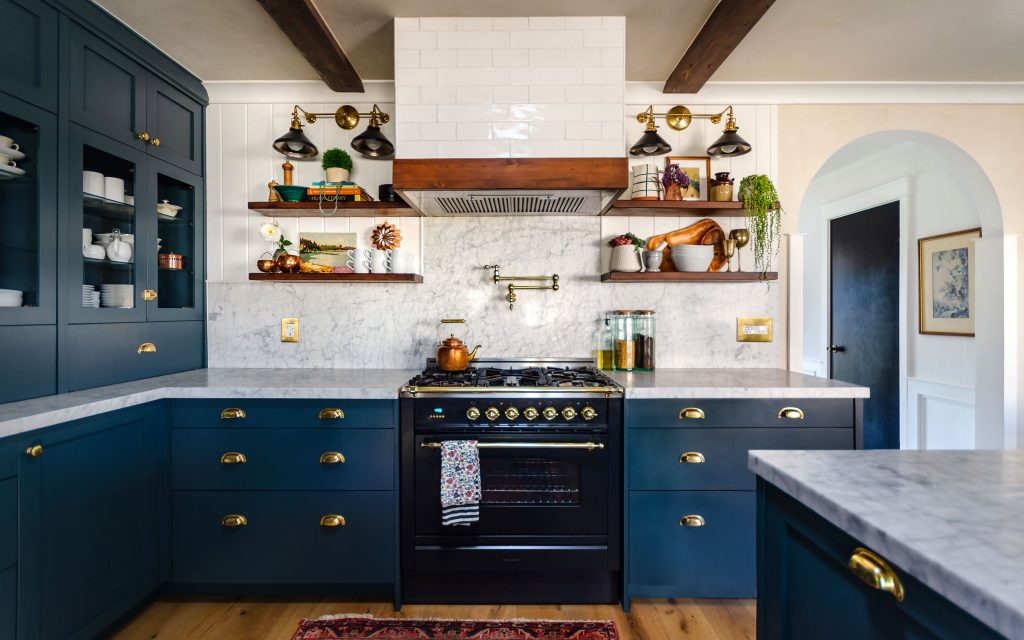
One element of our kitchen that did change from my initial designs was our upper cabinet arrangement. Originally, I had upper cabinets all along the wall where the hutch is now, wrapping around to the stove wall. This arrangement would have been very functional, and indeed probably would have provided us with more upper cabinet storage. However, something about it never felt quite right for us. I was very enamored of the cabinets that started at the counter that IKEA cabinets had just made easily possible. I knew I wanted to incorporate that idea somewhere, and I thought I would do it at the bar for a long time.
However, I realized I didn’t really need more upper cabinet storage… what I really needed was more drawers! And by creating a hutch on the wall perpendicular to the range wall, I could have the extra drawers I wanted! (It might sound silly, but we really wanted to create a drawer for all of our sprinkles that we use for cookie & cake decorating! Also, we needed a vitamin drawer). Some have wondered about the loss of counter space, but we have PLENTY of counter-space in this kitchen, we have never once wanted for more counter-space. Indeed, we still have almost 3 times the amount of counter-space we had before (not including new the bar and pantry counters)! And you can still use the space (there is about 10.5″) in front of the drawers, we use it regularly!
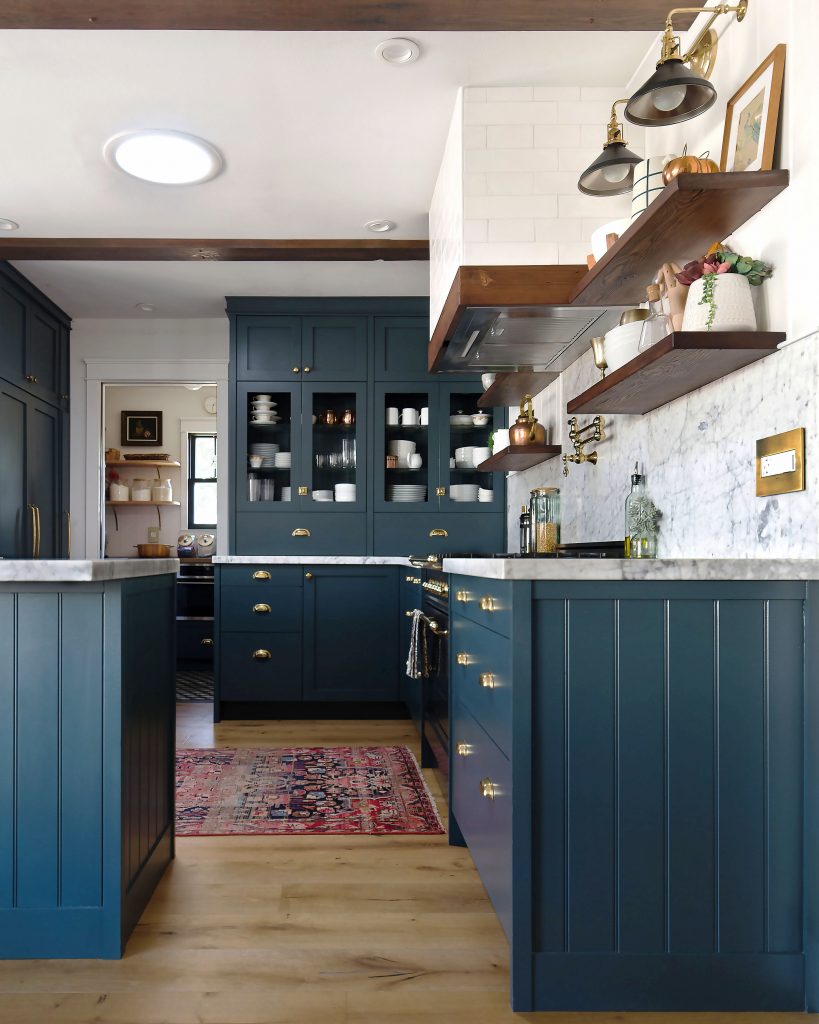

I realized I didn’t really need more upper cabinet storage… what I really needed was more drawers!“


Deciding on the counter-to-ceiling hutch meant that I would need to do open shelving around the stove, which I was interested in doing anyway. In the unnecessarily controversial open shelving vs. closed storage debate, I dont really have a definitive opinion! It all comes down to your lifestyle (and I am not here for a one-lifestyle-fits-all approach to anything). For us, I like a little open shelving for display and maybe a few everyday items, but I don’t think I would like it if it were my only upper storage. I like a mix of open storage, glass front storage, and covered storage to be able to display what I want, and to (just as important) hide what I want as well! Our glass front storage works because I am the sort of person who naturally puts things away in very a specific spot on a shelf or in a closet. If you don’t naturally do that already, it’s probably not a great idea for you. I also have a rule for my own dishware so that it will effortlessly look pulled together; white ceramic or porcelain, clear glass, copper, brass, wood. Any set of rules could work, but it’s important to define parameters to your pallet. But I still need to store things like our ice cream maker and our instant pot, so I like to have some closed storage as well!
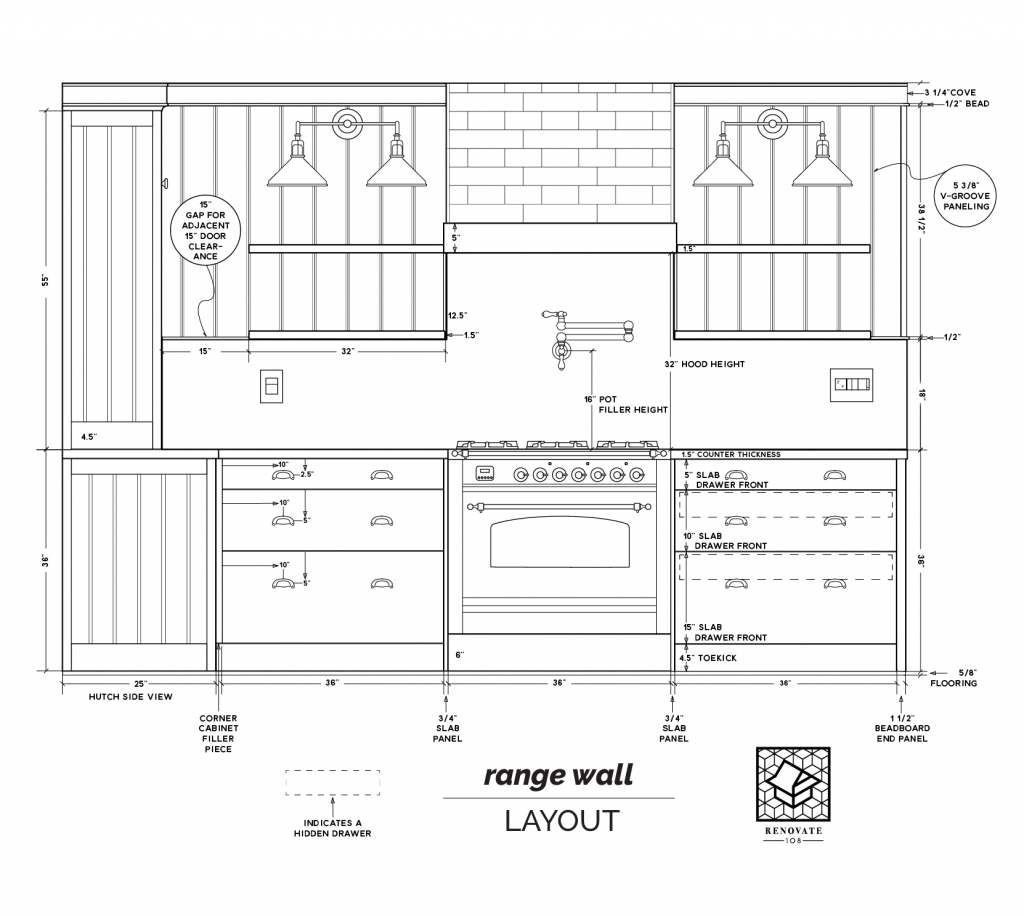
One important thing to note, is that if you’re doing a cabinet with a door next to an open shelf, the shelf must be cut to have enough space for the adjacent door to open. In our case we needed enough space to open a 15″ door, so we have a 15″ space and it works perfectly!


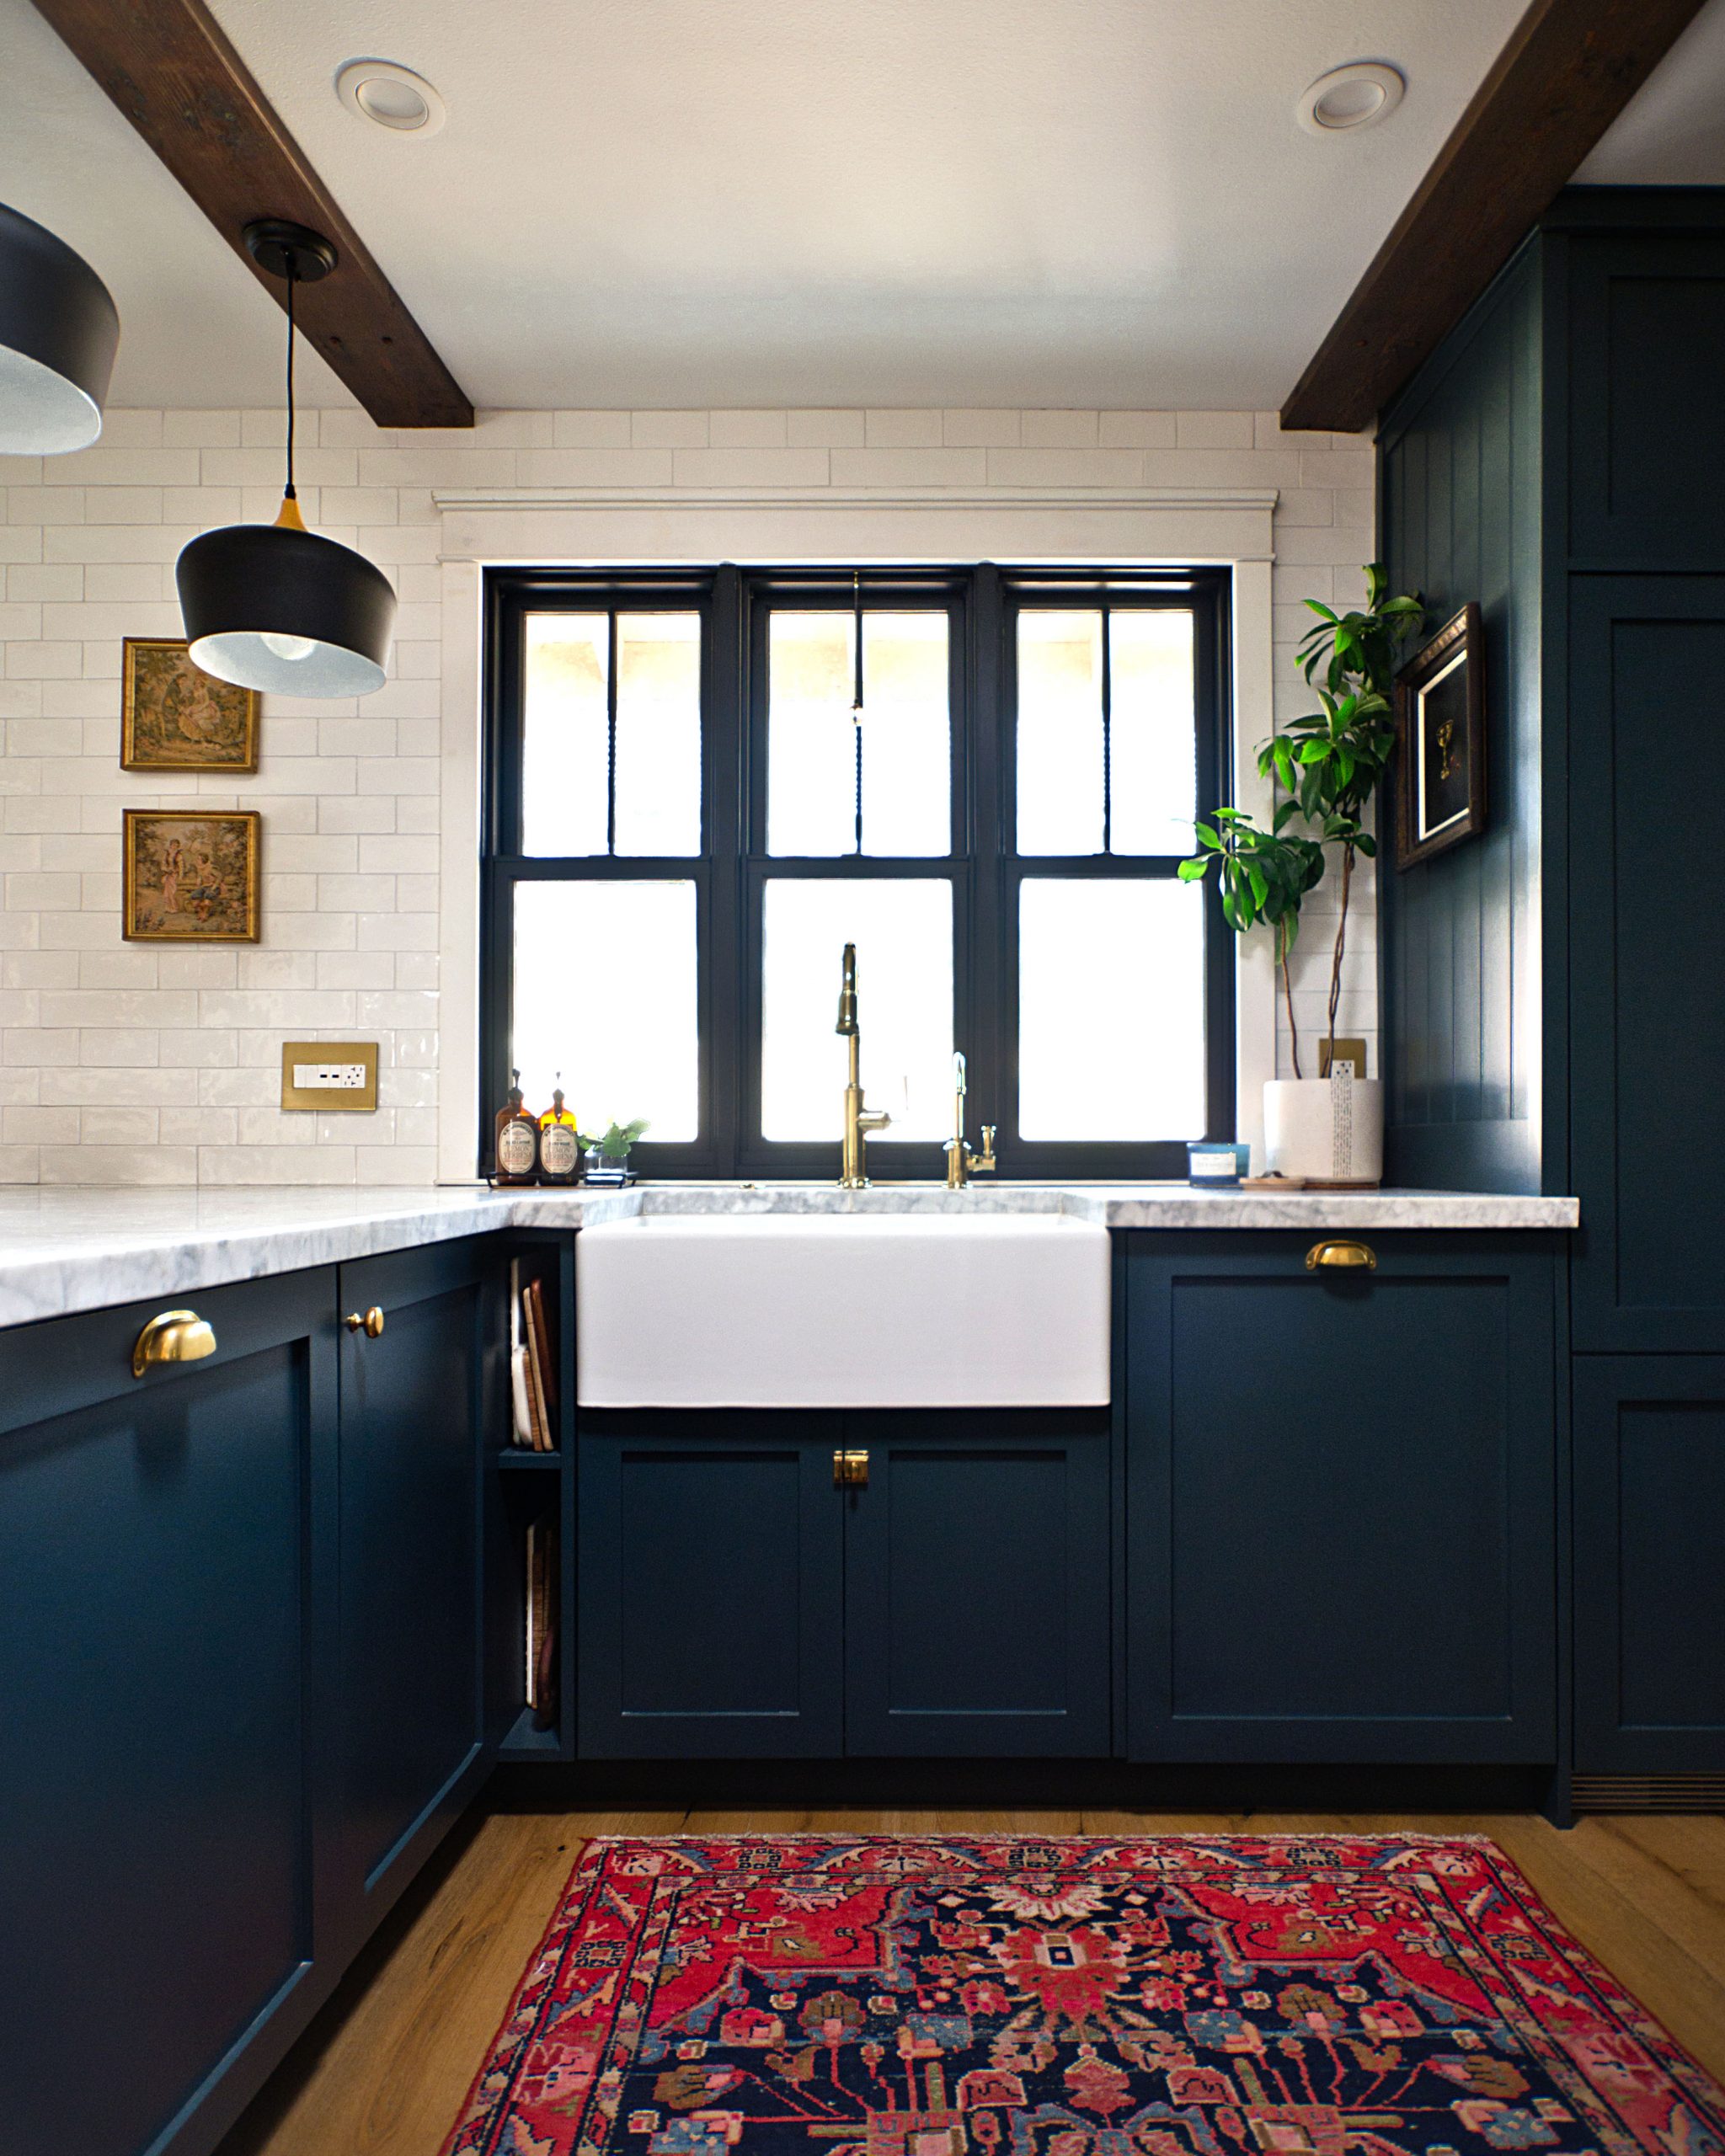
The Peninsula & Sink
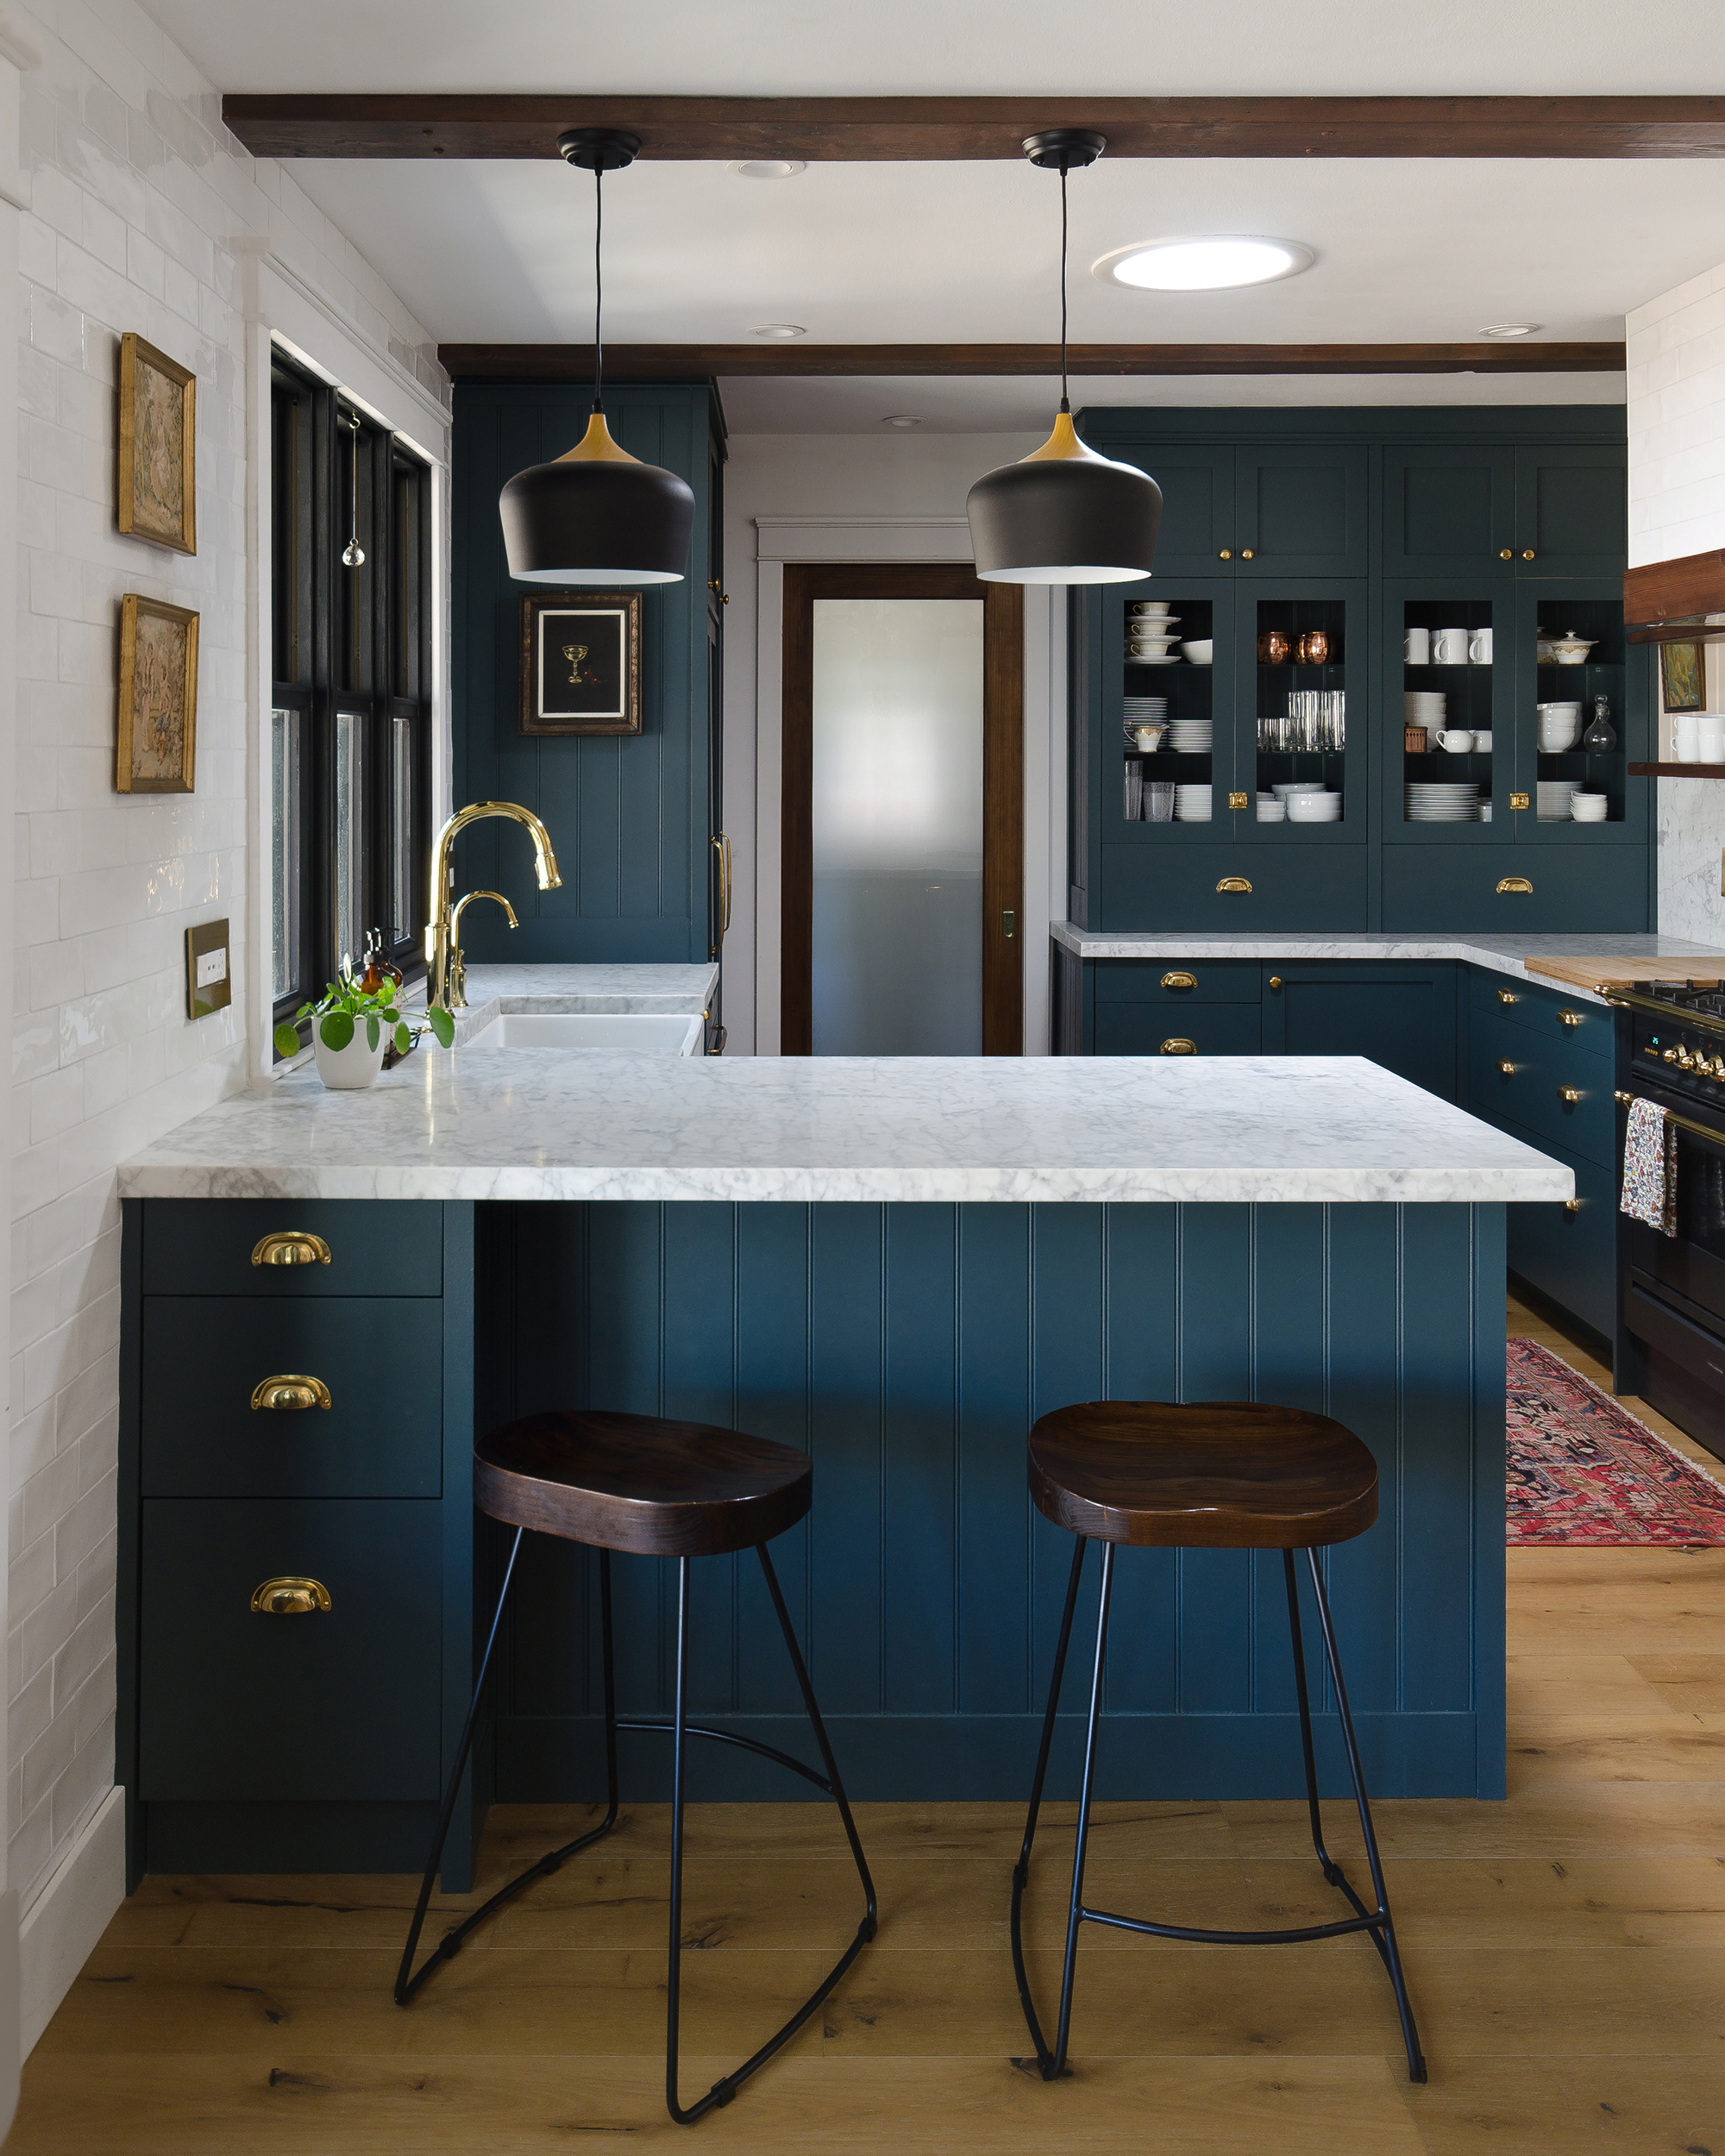
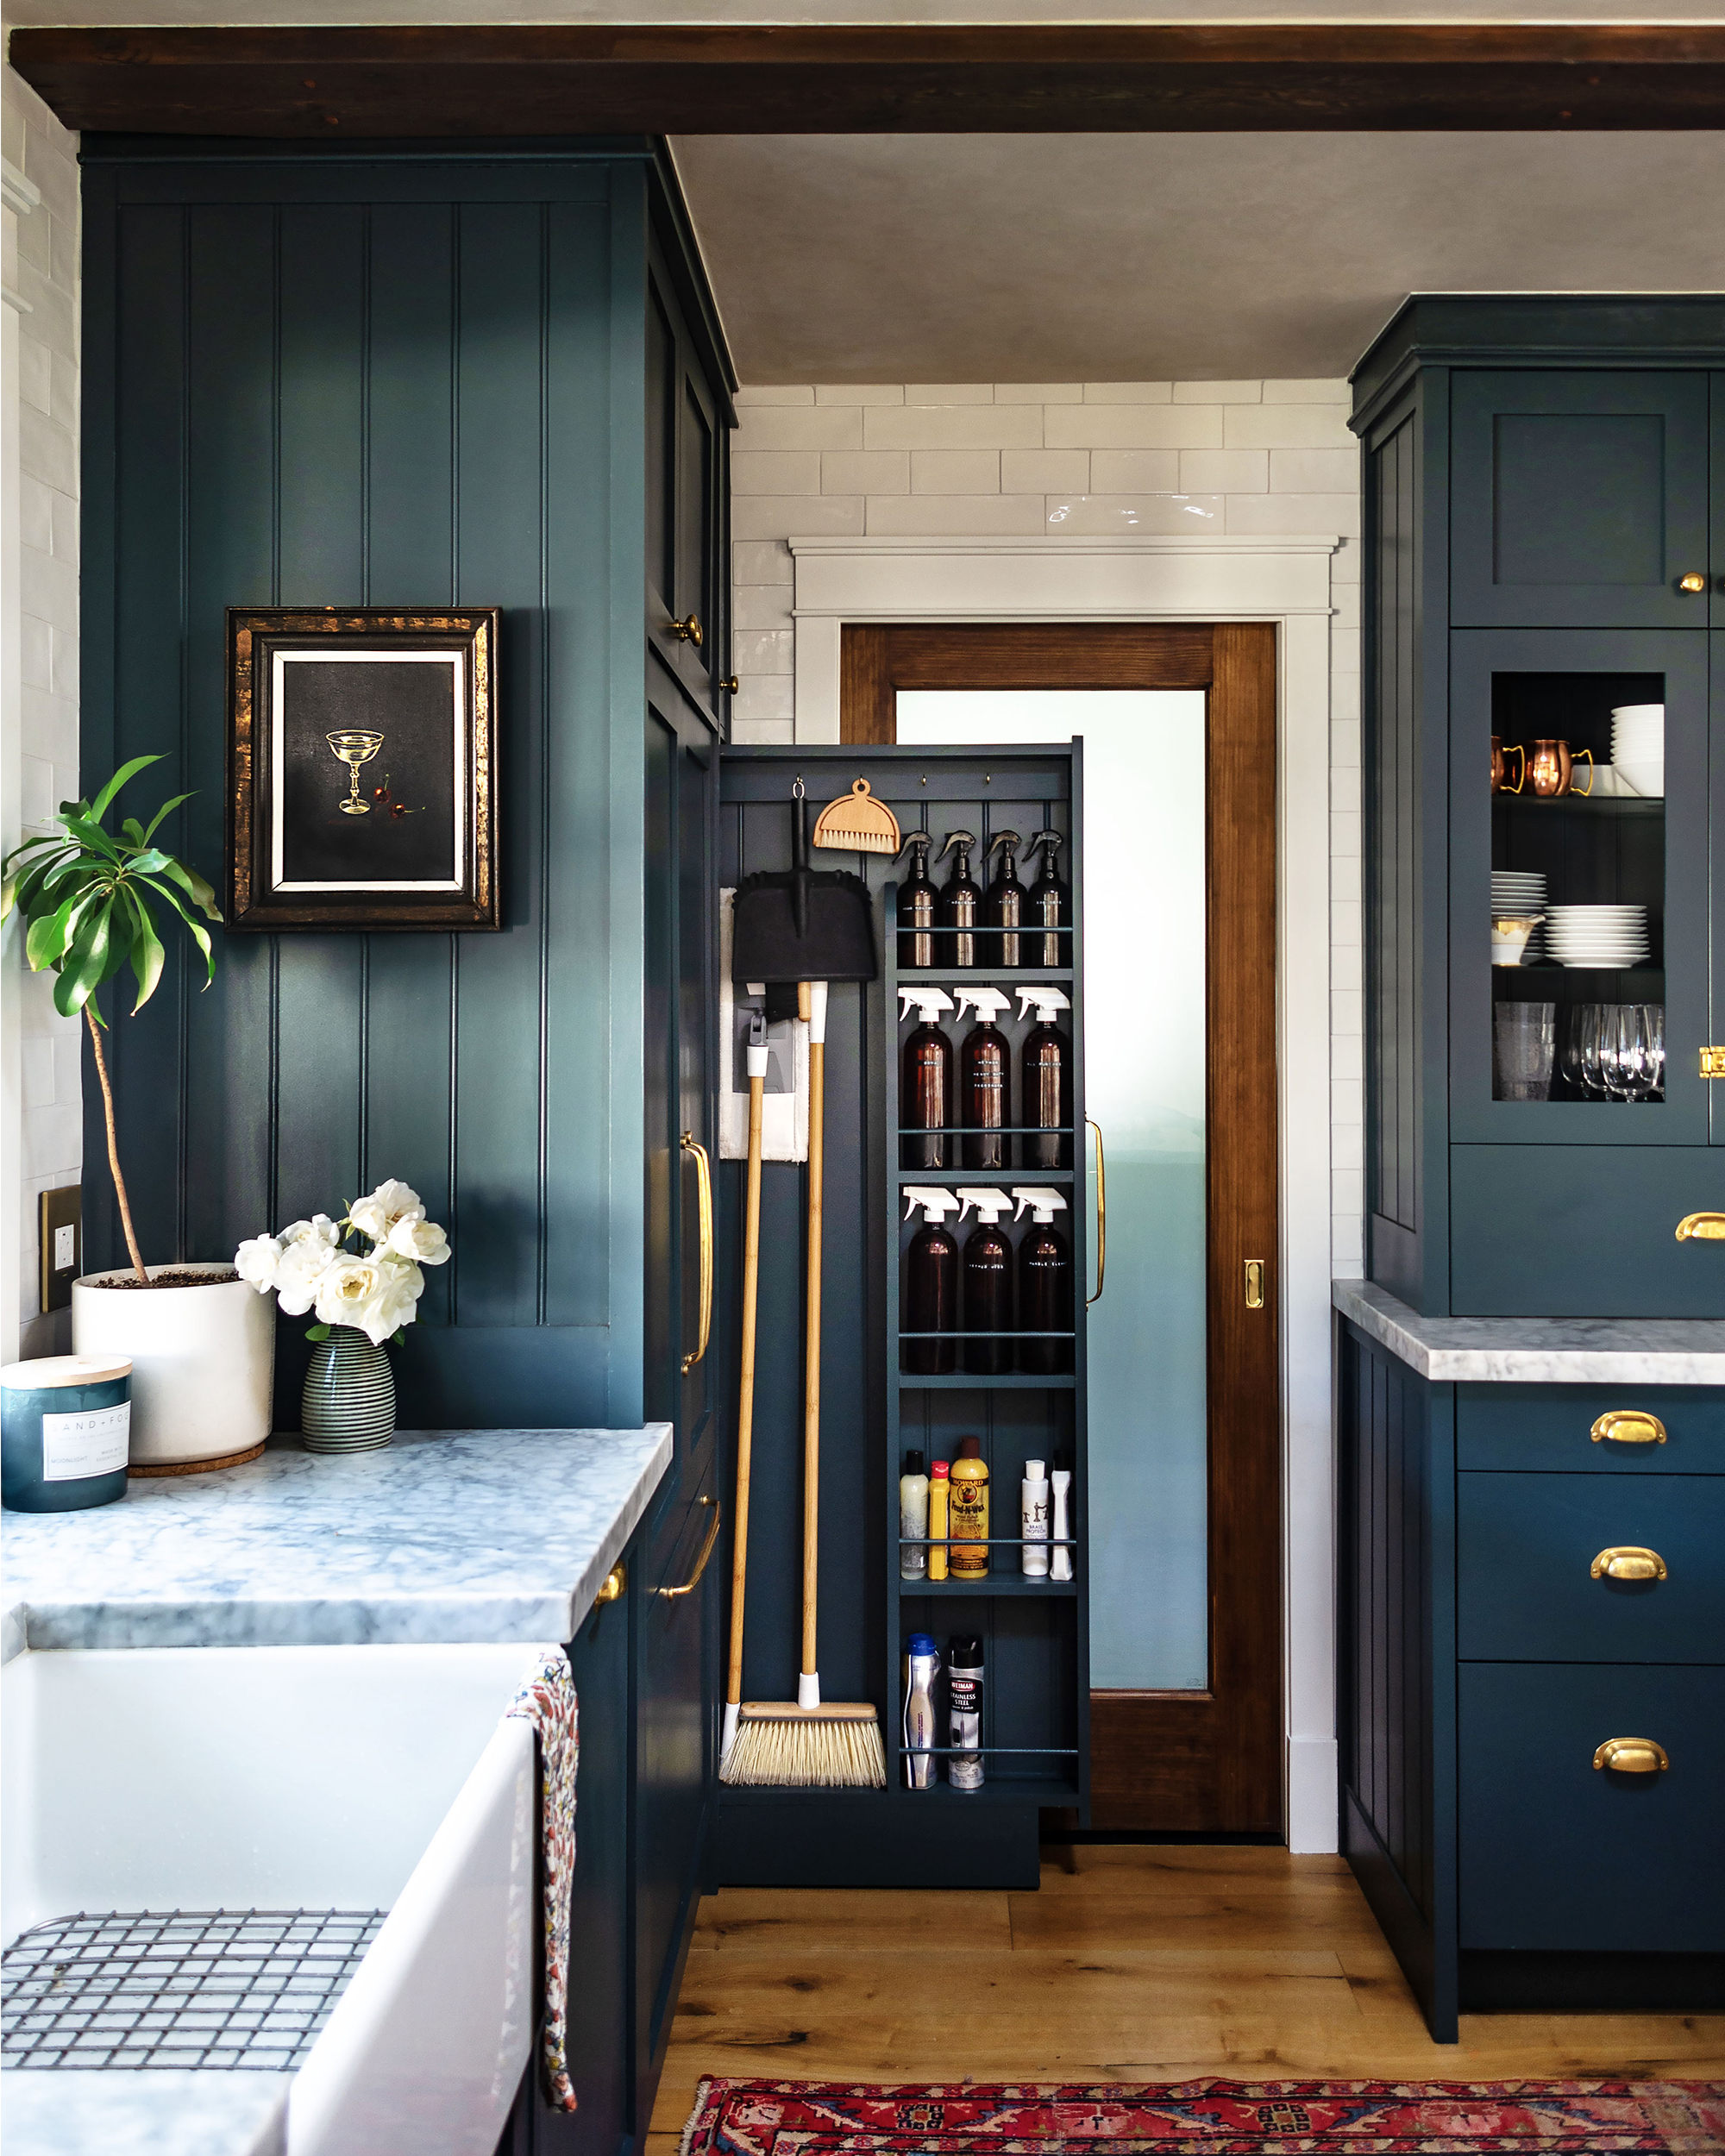
The last section I’d like to cover is our kitchen peninsula & our sink cabinet (we get a lot of questions about that sink cabinet!). We really didn’t have enough space for a kitchen island, and while I’m sure some people would have put an island in an 11 ft space, in general, I try not to force anything in a design. After testing it out in sketch up (just to know for sure it wouldn’t work), an island definitely felt forced in this space, as it would have only been able to be about 12″ D with 36″ walkways. And we loved the peninsula anyhow! Our kitchen previously had a bar height counter above the peninsula, and we decided that making that space all counter height would really help to make the kitchen feel more open (along with getting rid of the soffit). We also really wanted a little cabinet on the other side of the peninsula for a “homework station”. However, I wasn’t willing to give up on my broom cupboard pullout or my cutting board cubby, which added about 7″ to the total space, nor was I willing to go down to a 24″ sink, so we were running into a problem with the how far our cabinets were encroaching into the dining space…
We really didn’t want the dining space to feel cramped, especially in the space between the bar stools and the dining chairs. Walkways should be about 36″, and there should be about 36″ behind chairs, to allow people to pull them out and sit comfortably, and still have someone walk behind the chair. We already were compromising in this situation, and I didn’t want to have to pull out the counter overhang the full 15″ needed to fit our homework station cabinet. Then I thought, is there enough room with the corner carousel to countersink that cabinet? We could get away with a 9″ overhang and counterstools that have a small footprint, and still have all the elements we want; a six person dining table, counter stools, a homework station, the cutting board cubby and a broom pullout. Corner cabinets are notorious space-wasters. Perhaps we would instead be able to encroach upon the dead space in the corner cabinet, instead of risking chairs and people constantly bumping into each other.


And, as it turns out, I was right! We were able to countersink it by 6″ (and, if you’re in need, probably could have done more!). After adding the side panels you’d never know that this cabinet was countersunk. You have to bend down, and look inside the corner cabinet to even sort of see it. And, I am happy to report that we’ve never had a problem with chairs bumping into things after almost 2 years of living with this arrangement!
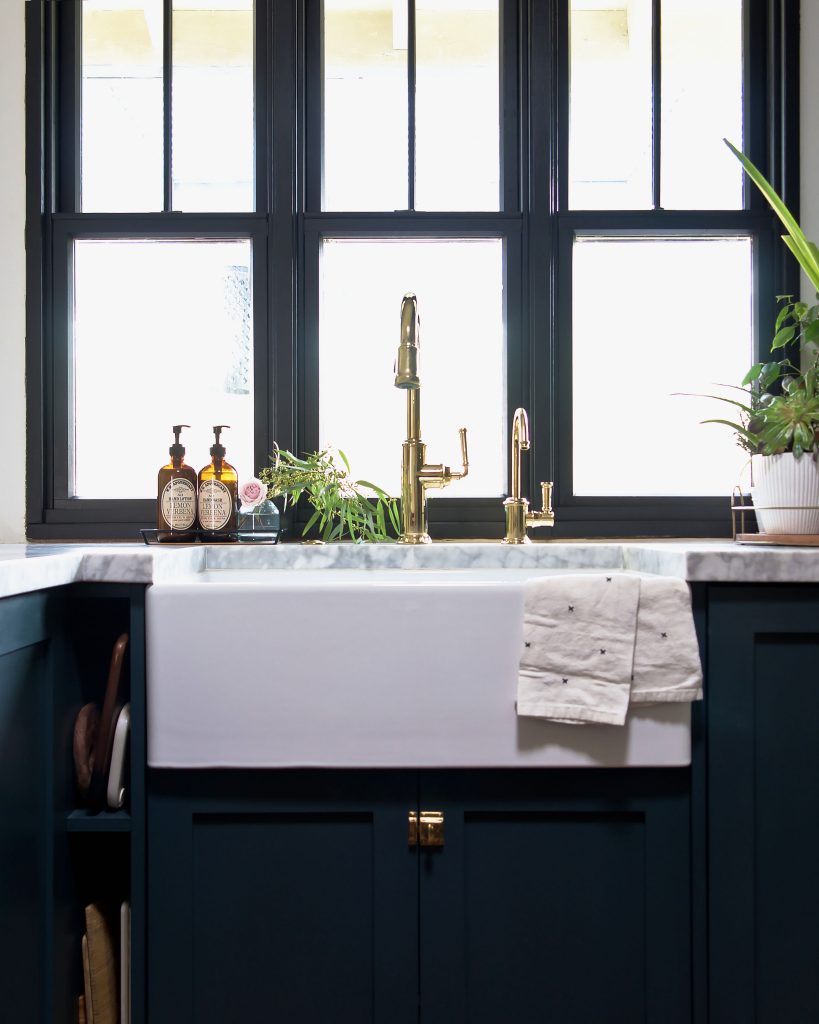
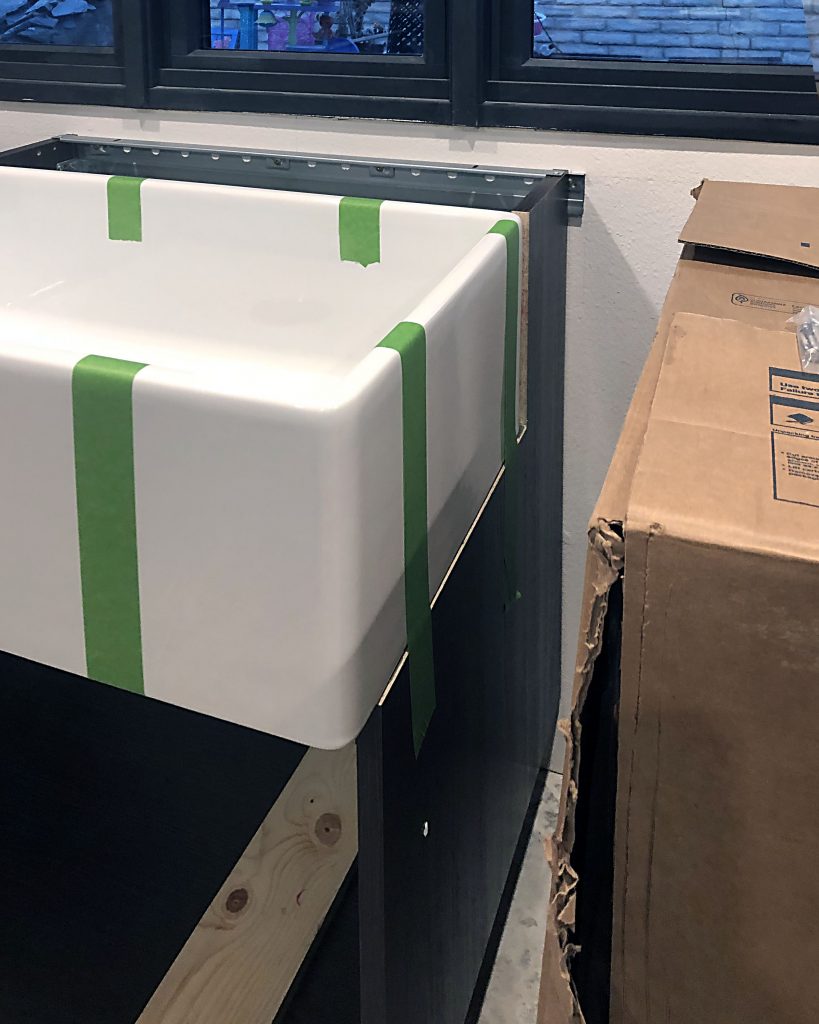
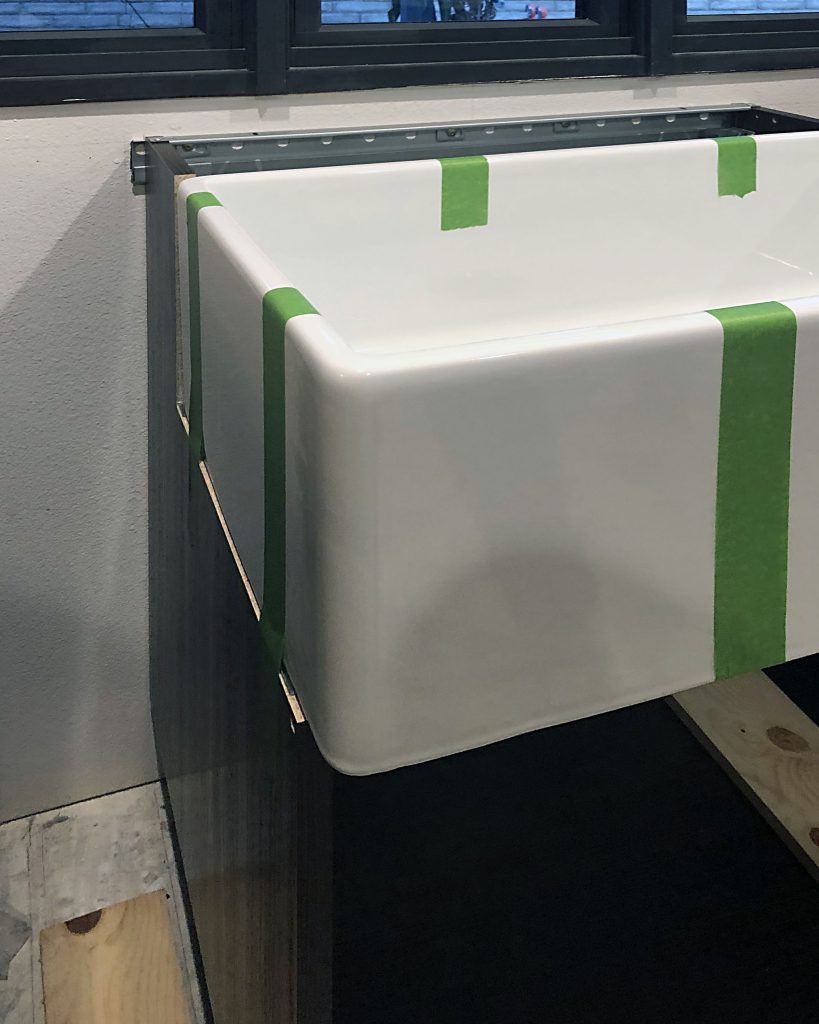
And, as I stated above, I didn’t want to compromise on the size of our sink. We were very much looking forward to wide, single basin sink large enough to easily fit tall pots and pans, and the occasional child! The kitchen sink cabinet is composed of a precisely 30″ W x 10″H sink , on a 30″W sink cabinet, with two 15″W x 20″H Semihandmade Shaker doors below it. We have no filler piece between the doors or and the sink. Because it is an apron front sink, it required us to cut away some of the cabinet, and it also required us to find a sink that did not taper and had very precise measurements. The sink needs to be supported on two sides by rails that are at least 3/4″ thick, and the cabinet itself satisfied that requirement after it was cut away to fit the sink. However, we also used the two reinforced metal rails that come with the IKEA sink cabinet, so our sink is supported on 4 sides. It is not glued in or screwed in anywhere (I guess that’s a common way for sinks to be installed) and it still blows my mind that it’s technically just sitting there!
Do I have any regrets? Ostensibly, no. I am honestly a little surprised, I thought I’d have at least a handful of “Argh, I wish I did that differently!”, but I don’t. My singular big regret is that I’m not happy with our beverage center; it was advertised as built-in, but it is not! It is only panel ready, but it requires 3/4″ of space around it to put a panel on it… we tried to veneer it and it did NOT come out great, and it still has to have gaps around it and it is not what I thought I was buying at all. But this problem is easily solved by buying a new, truly built-in appliance in the future. The only other tiny thing I wish we could have done was make the broom cupboard a bit wider to fit a roll of paper towels like I had originally envisioned, but it felt silly to push out the whole kitchen for a roll of paper towels… (They are so thick when they are brand new!). It is better than I imagined it would be!
Hopefully I answered all of your questions regarding the cabinet dimensions and layout! I think the organization of the kitchen (i.e. what’s in those drawers?!) warrants a separate post, as well as separate posts covering appliances, our custom pieces & paneling, lighting, the broom cupboard, etc. If there is anything you have a question about, please leave a comment below!
*Interested in all the resources for our kitchen? Head to the Shop our House page!
*Wondering why we have dark wood IKEA sektion boxes? We were amongst the last to be able to purchase these boxes in March 2018 (yes, we bought them 7 months before we installed them!), and by the time we were making returns and exchanges in October and November, they had already phased out the wood boxes.
30 replies on “Our IKEA Kitchen Layout”
This is fantastic! Amazing job in every respect!
Impressive work! It came out lovely. I am looking forward to the post on the pull-out broom cabinet! I need a skinny one to fit next to my W/D.
Check out the broom cupboard highlight while you wait for the post to go live! The post here will cover some key things like dimensions and we’re hoping to figure out how to make a tutorial with adjustable measurements that people can adapt to fill in their own situations, but the highlight will give you some basic understanding! 🙂
I’m obsessed with the broom cupboard – did you make that yourself? Using Ikea cabinets?? I’m in the process of renovating my own kitchen and have the perfect spot for something like that. Would love to learn more! Also – what’s in the small cupboard right above the broom cupboard?
Yes, it’s really great! We have plenty of posts in the works coming up (since we just launched the site!) and the broom cupboard is definitely one of them! In the meantime, feel free to check out the instagram highlight titled “broom cupboard” for more immediate information! The highlight covers our initial fails with it and how we got it to work!
Since it seemed un-feasible to make a pullout over 80″ tall (MDF/wood, most materials in general will warp when that tall and thin), we decided to make the pullout line up with the fridge, and use the small cupboard up top for storing sheet pans, trays and muffin tins! 🙂
The link to Instagram post is showing unavailable. I need to build a broom closet for my space please share alternate link
Hi Michelle! I have checked both links to the broom cupboard highlight in the comment thread. They are both linking me to the highlight just fine. If you are having trouble, please head to my instagram, https://www.instagram.com/renovate108/, and look through my highlights until you see the one titled “broom cupboard”, and there you can see how we built it. Please note I don’t share any diagrams or anything in the highlight, but it is just a documentation of how we built it. Thanks!
What a treasure trove of information! IKEA + SHM kitchens for life 🙂
Yes indeed!! 🙌
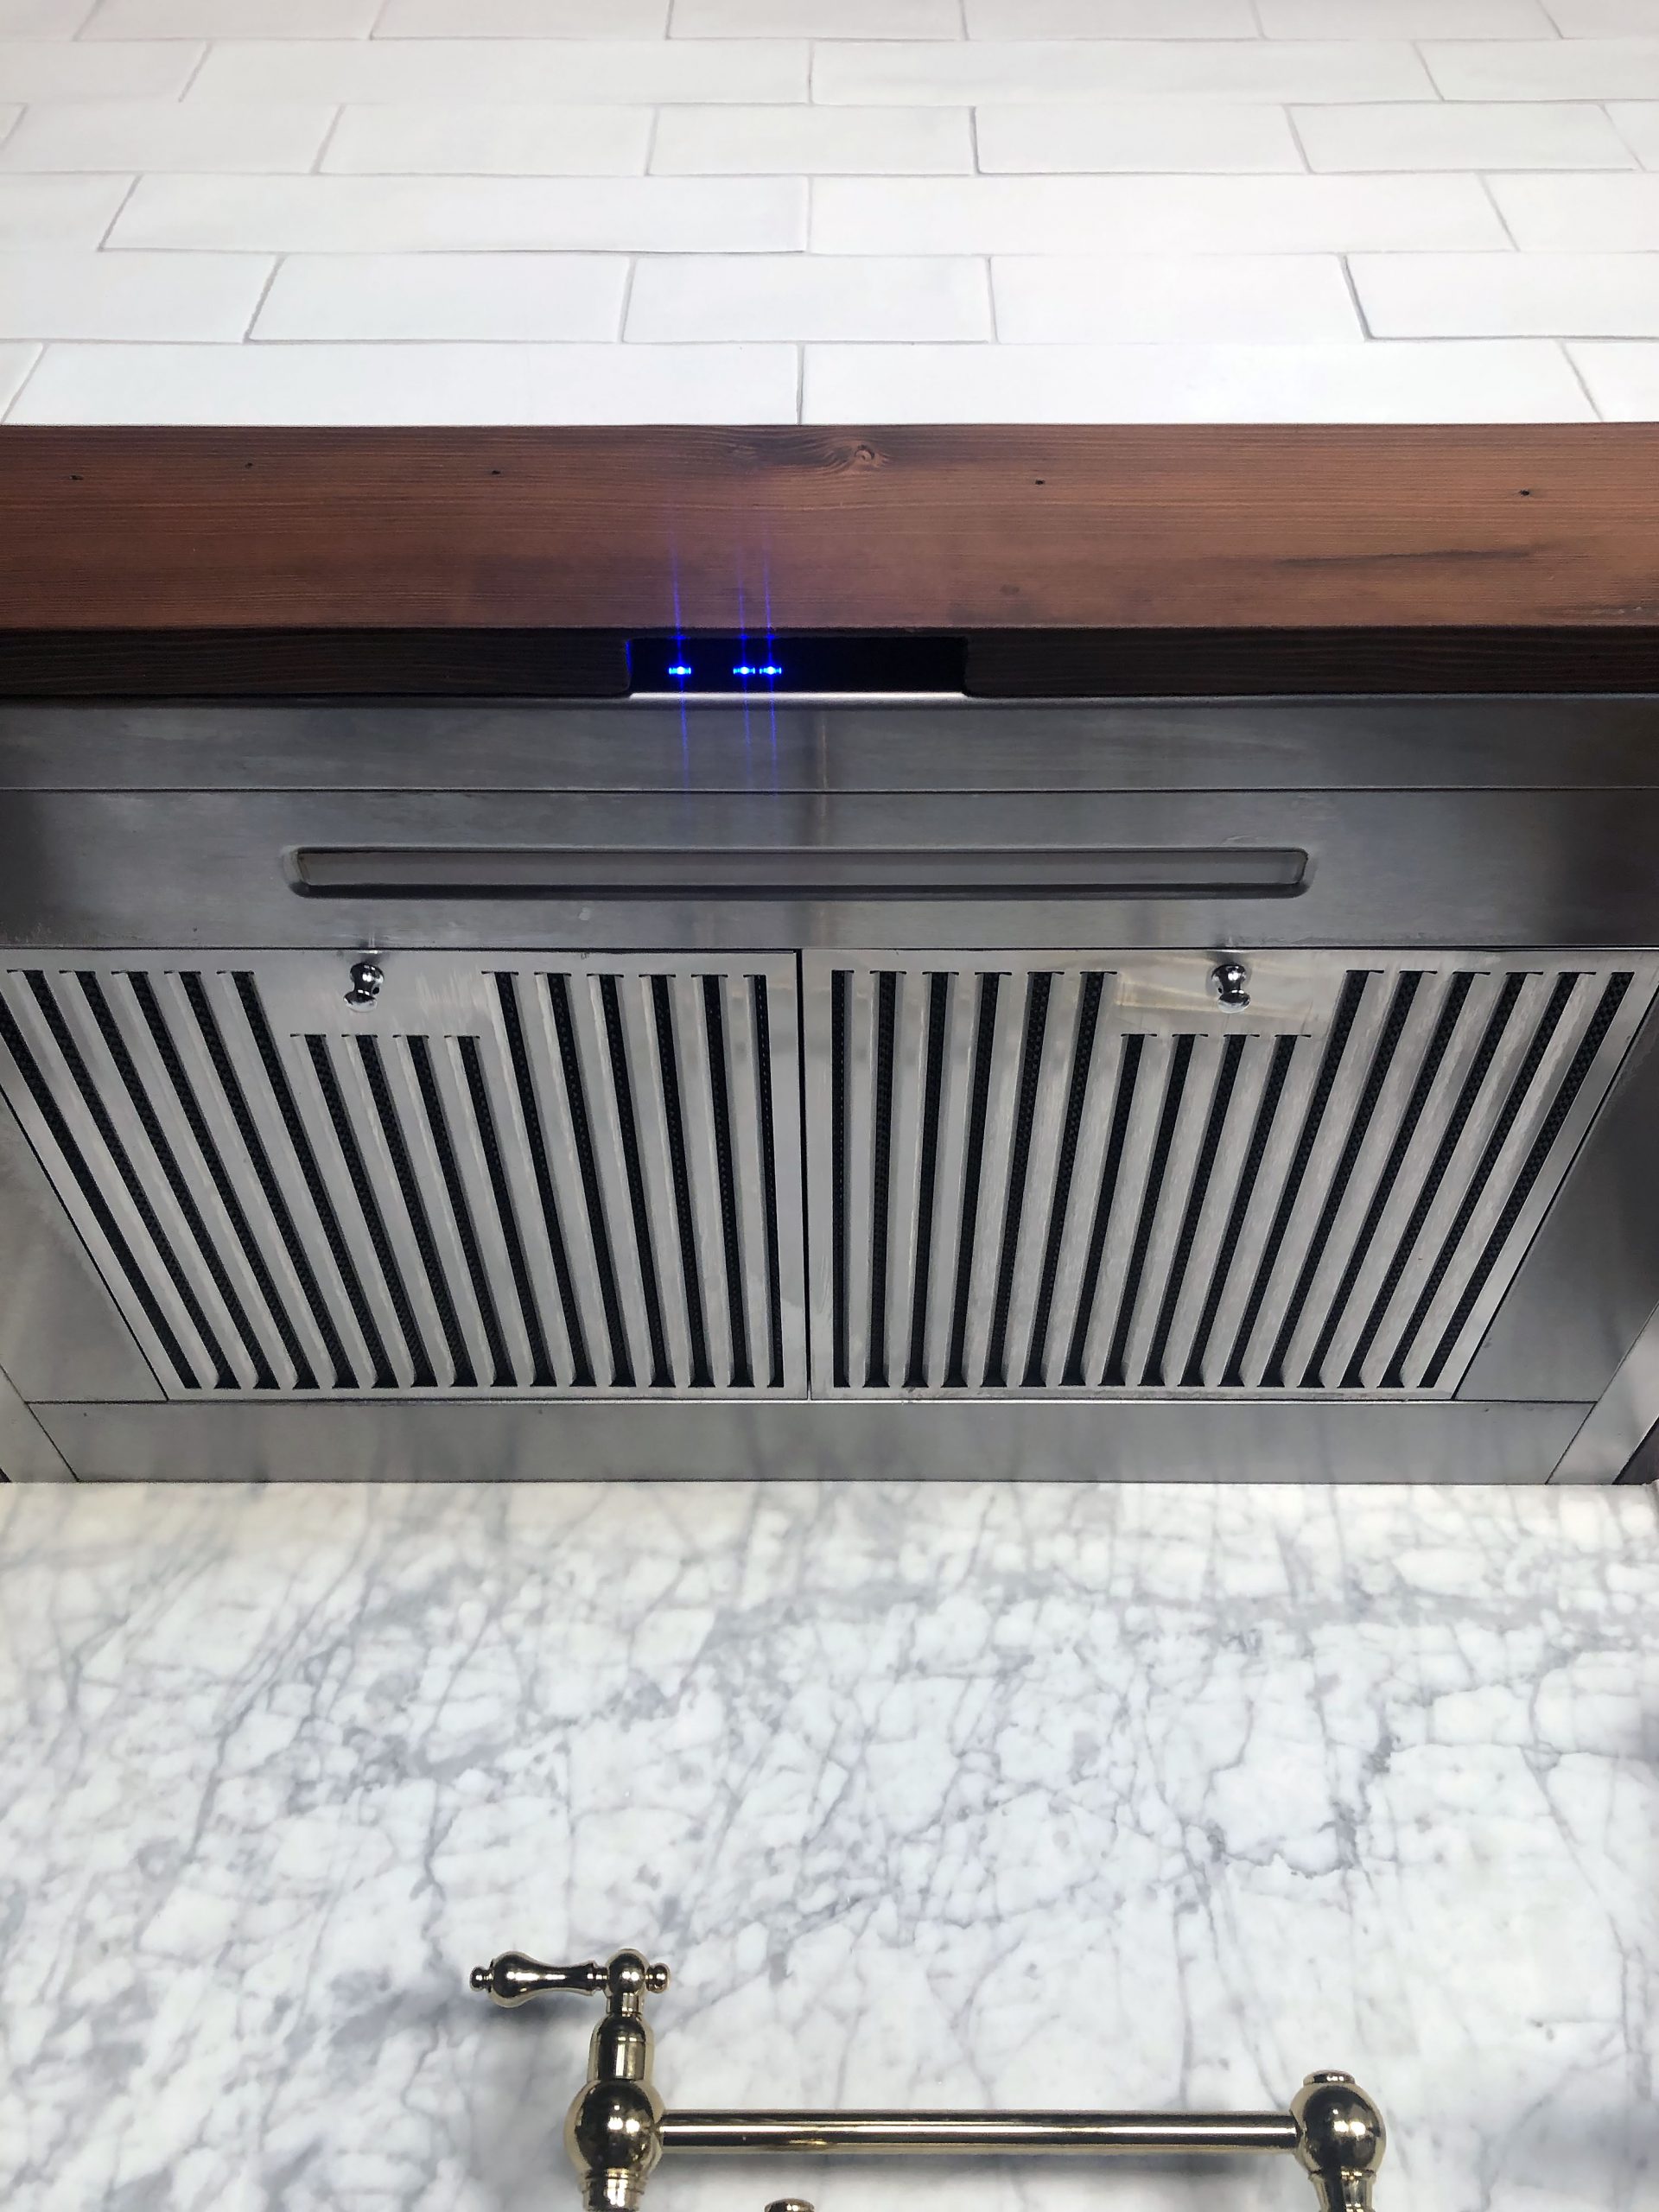
Can you share how your range hood works? I like how it’s concealed but where do you access the controls?
Great Question! I will go over it in more depth in our post about our appliances, but we did indeed make a mistake and buy a hood that was not meant to be integrated/covered like ours! Zephyer DOES make a wireless remote to turn on their hoods (super cool!) but we decided to make the hood mantle accommodate access to the buttons. The wood in front of the buttons is routed out! I am going to try to attach a photo to this comment.
Could you talk about how you made the inside of the glass fronted Ikea cabinets so lovely? How did you paint them and what covering did you place in the back of them? Thanks!
Hi! I think that will be covered in a separate post, but I go over it in the very first semihandmade kitchen highlight on insta!
Thank you for your response. So glad that you have created a website because it’s almost impossible to find things on Instagram. Also, I just have to say that I found out about you through doing a search on Devol style kitchens and then as I was looking at one of your highlights I noticed that Devol was one of the inspirations for your kitchen 🙂
This is BEYOND helpful as I’m planning my own IKEA kitchen remodel! Such an inspiration. It really goes to show how sophisticated you can make an IKEA kitchen look with a bit of effort. I had a few questions I was hoping you could answer:
How exactly did you make the beadboard end panels? It looks like you started with a shaker style panel and then cut a piece of beadboard to fit? Did you make these yourself or did you get the shaker panels from Semihandmade and then just cut the beadboard to fit? If you had any specifics on the dimensions on the wood trim, backing board and panel thickness, that would be super helpful.
How much overhang do your countertops have over your base cabinets?
Thanks so much for your time and thanks for sharing your beautiful kitchen with us!
Hi! Sorry for the delayed response, but I will answer here for anyone who is still curious about this. We bought the beadboard in 4ft x 8ft x 1/4″ MDF sheets that we trimmed down to size and placed inside the shaker-like panels that we made. We used 2×2 pine posts to create the stiles and we did a 4.5″ (same size as the toe kick) base out of 3/4″ MDF. I will make a post soon about all the small adds and side panels in our kitchen! 🙂
Hi Jessica and Tyler! Would you mind sharing the name of this gorgeous paint color? Kudos to you!
Hi! This color is Narragansett Green by Benjamin Moore, HC-157. You can see more of the resources for our house listed here; https://renovate108.com/shop-our-house/
Hi Jessica, can you please share more photos of how you extended your tile into your dining area? I am super intrigued by this as I love how it connects the rooms. Also can you please link the grout color? Thank you!
Hi! I don’t know if I have any photos available that can show the whole wall (its about 18 ft!). Maybe these will help though?
The grout here is the white color from servoperl royal! https://verosystems.us/kiesel-servoperl-royal-grout/
The highlight here begins with the grout and some video of this wall; https://www.instagram.com/s/aGlnaGxpZ2h0OjE3OTM4NTAxODc2MzEyMzAw?igshid=b9wzr1kiar7e&story_media_id=2046705166297568263
What an amazing home you and your hubby are creating for your beautiful family! Creating memories and sweat equity at the same time is a definite win-win! We are also in the middle of conquering a kitchen renovation and have always been DIYers as well. We still aren’t 100% sold on the Ikea shells but definitely love the SHM doors. I have a couple questions for you before we solidify the direction we wish to go and appreciate your time in answering any if you can.
How do you like the Ikea shells even though they aren’t made of wood? Do you find them durable and have they held up well for you over the years?
I haven’t seen any updates about how painting the interior of the Ikea shells for your hutch has held up over the years for you. Did they scratch or chip off easily? Did you do any sanding down or other prep work before spray painting them to help the paint stick better to the shell since it isn’t actual wood?
I saw you ordered your SHM “DIY” and then assembled and painted them yourselves. Painting our own scares my husband and he thinks we can’t do it right to make it look nice and professional. Yours look fabulous! Was this a difficult task or was it just time consuming? Do you think it was worth the cost savings or better to just pay for SHM to do it all?
I noticed on places like your hutch you didn’t leave any clearance from the bottom of the wall cabinets to the countertop…have you had any problems with clearance and opening up your hutch bottom drawers?
Thank you again for sharing your lovely home with all of us others trying to achieve our own, and for your transparency when things don’t always go as planned and you have to pivot…it’s reality and it helps us realize we aren’t alone and don’t need to feel defeated when we run into our own issues along the way! 🙂 I can’t wait to see your addition after you are able to get that completed!
Hi Jill! What a lovely comment!
To answer your questions;
1) Its been almost 2 and a half years since we started installing the cabinets, and I have zero regrets. No issue with the IKEA boxes. Really, the IKEA boxes are EXCELLENT. I understand that when it comes to IKEA’s least expensive furniture, that furniture might not last, but the IKEA kitchen boxes are top of the line. They use the highest quality hardware as well (blum), which is the same stuff most custom kitchen cabinetry companies use. Also, the boxes I got were made in the USA!
2) To paint the interiors, I did lightly sand and I sprayed two layers of primer and two layers of paint, and let it sit without touching it for 3 days. Then I used glass shelves instead of solid so that I could avoid scratching the paint off the shelves and also so the light from the interior cabinet light would shine through. We’ve had no scratching, but nothing actually comes in contact with the painted interior. I would not suggest doing this on all your cabinets. You can details of when I was painting and prepping these cabinets in my first semihandmade highlight on instagram.
3) The DIY line is pretty much necessary if you want to do any custom work. You can try to paint match their foil finishes, but it will never look like the same finish. If you are doing any custom work (in our kitchen, our fillers, side panels, the broom closet, the cutting board cubby and the painted interiors of the glass front cabinets are all custom work. I bought a paint sprayer and once I figured it out it was great. ALL info on that is on the Shop Our House & Resource List.
4) Clearance on the bottom drawer is not an issue for us. I imagine it could be if it was on an unlevel floor or surface, but counters are typically very level. 🙂
What a beautiful kitchen! I’m curious – what are the cabinets resting on top of? It the photo showing the dry fit of the kitchen hutch, it almost looks as if you used 4-by-4’s but that wouldn’t provide 4.5 inches of height. I know IKEA offers the 4.5 inch CAPITA legs, but I’d imagine it’d be difficult to a fix a toekick to those. I’d love to know what you used. Thanks!
We used 2x4s and cut them to 4.5″ attached to a scrap of our wood flooring. We screwed the cabinets into those from the inside, and then we used them to nail in the toekick 🙂
Love what you’ve done!! Do you have a schematic with measurements of your inspired bar area? Great idea!
No I dont, but you can get the measurements of that area from the top down view. It is exactly 24″x 72″. Ceiling height is 8ft! 🙂
Just amazing. I love your style– its classic, modern, and for lack of a better word (and i hate to use it) “masculine”! You have inspired me to start planing my own renovations! I’m very interested in the custom work you all did, like the panels on the sides of the cabinetry and the front of the hutch! I’m almost wondering if I could do something similiar to me existing cabinets to update them and give them the inset doors look ( don’t have money for all new cabinets unfortunately!)
Your kitchen is absolutely magnificent! Can you tell me about the gorgeous wood floors? I love how they complement the overall design. Thank you!
Hi there just wondering what fridge you have and if the panels are diy or was the fridge panel ready ? Is the depth of the fridge 24inches along with the cabinets on the side with this sink? Thank you
Jessica, your kitchen is so beautiful. It has inspired us to build our kitchen in a similar way, which leads to my question. We love the bead board side panel accents. How did you finish the edges of the side panel with the bead board on top. They looks seamless.